Connecting Google Colab to the Kaa IoT platform
The Internet of Things (IoT) is rapidly changing how we engage with technology in today's digital landscape, from smart homes to industrial automation. One key aspect of IoT development is the ability to efficiently analyze and process data collected from IoT devices. Google Colab, a cloud-based Jupyter Notebook environment, offers a powerful platform for data analysis and machine learning tasks, while KaaIoT provides a comprehensive IoT platform for managing and analyzing device data.
In this Google Colab tutorial, we will walk you through the process of seamlessly connecting it to the Kaa IoT platform. By integrating these two powerful tools, you can harness the capabilities of Google Colab for data analysis and visualization while leveraging the robust infrastructure of KaaIoT for managing IoT device data, taking your projects to the next level.
Prerequisites
To continue with this guide we will need the following:
- Kaa Cloud account
- Connected device to Kaa IoT Platform
If you haven't connected a device yet, you can get started on your IoT project by following the tutorial 'Connecting your first device.'
Getting PAT token
To begin utilizing a device's data in our Google Colab project, we'll require a PAT (Personal Access Token). Here's a brief overview of how to obtain it.
1. Log in to your Kaa Cloud tenant
2. Click on User Management > Advanced Settings, as shown in the picture below:
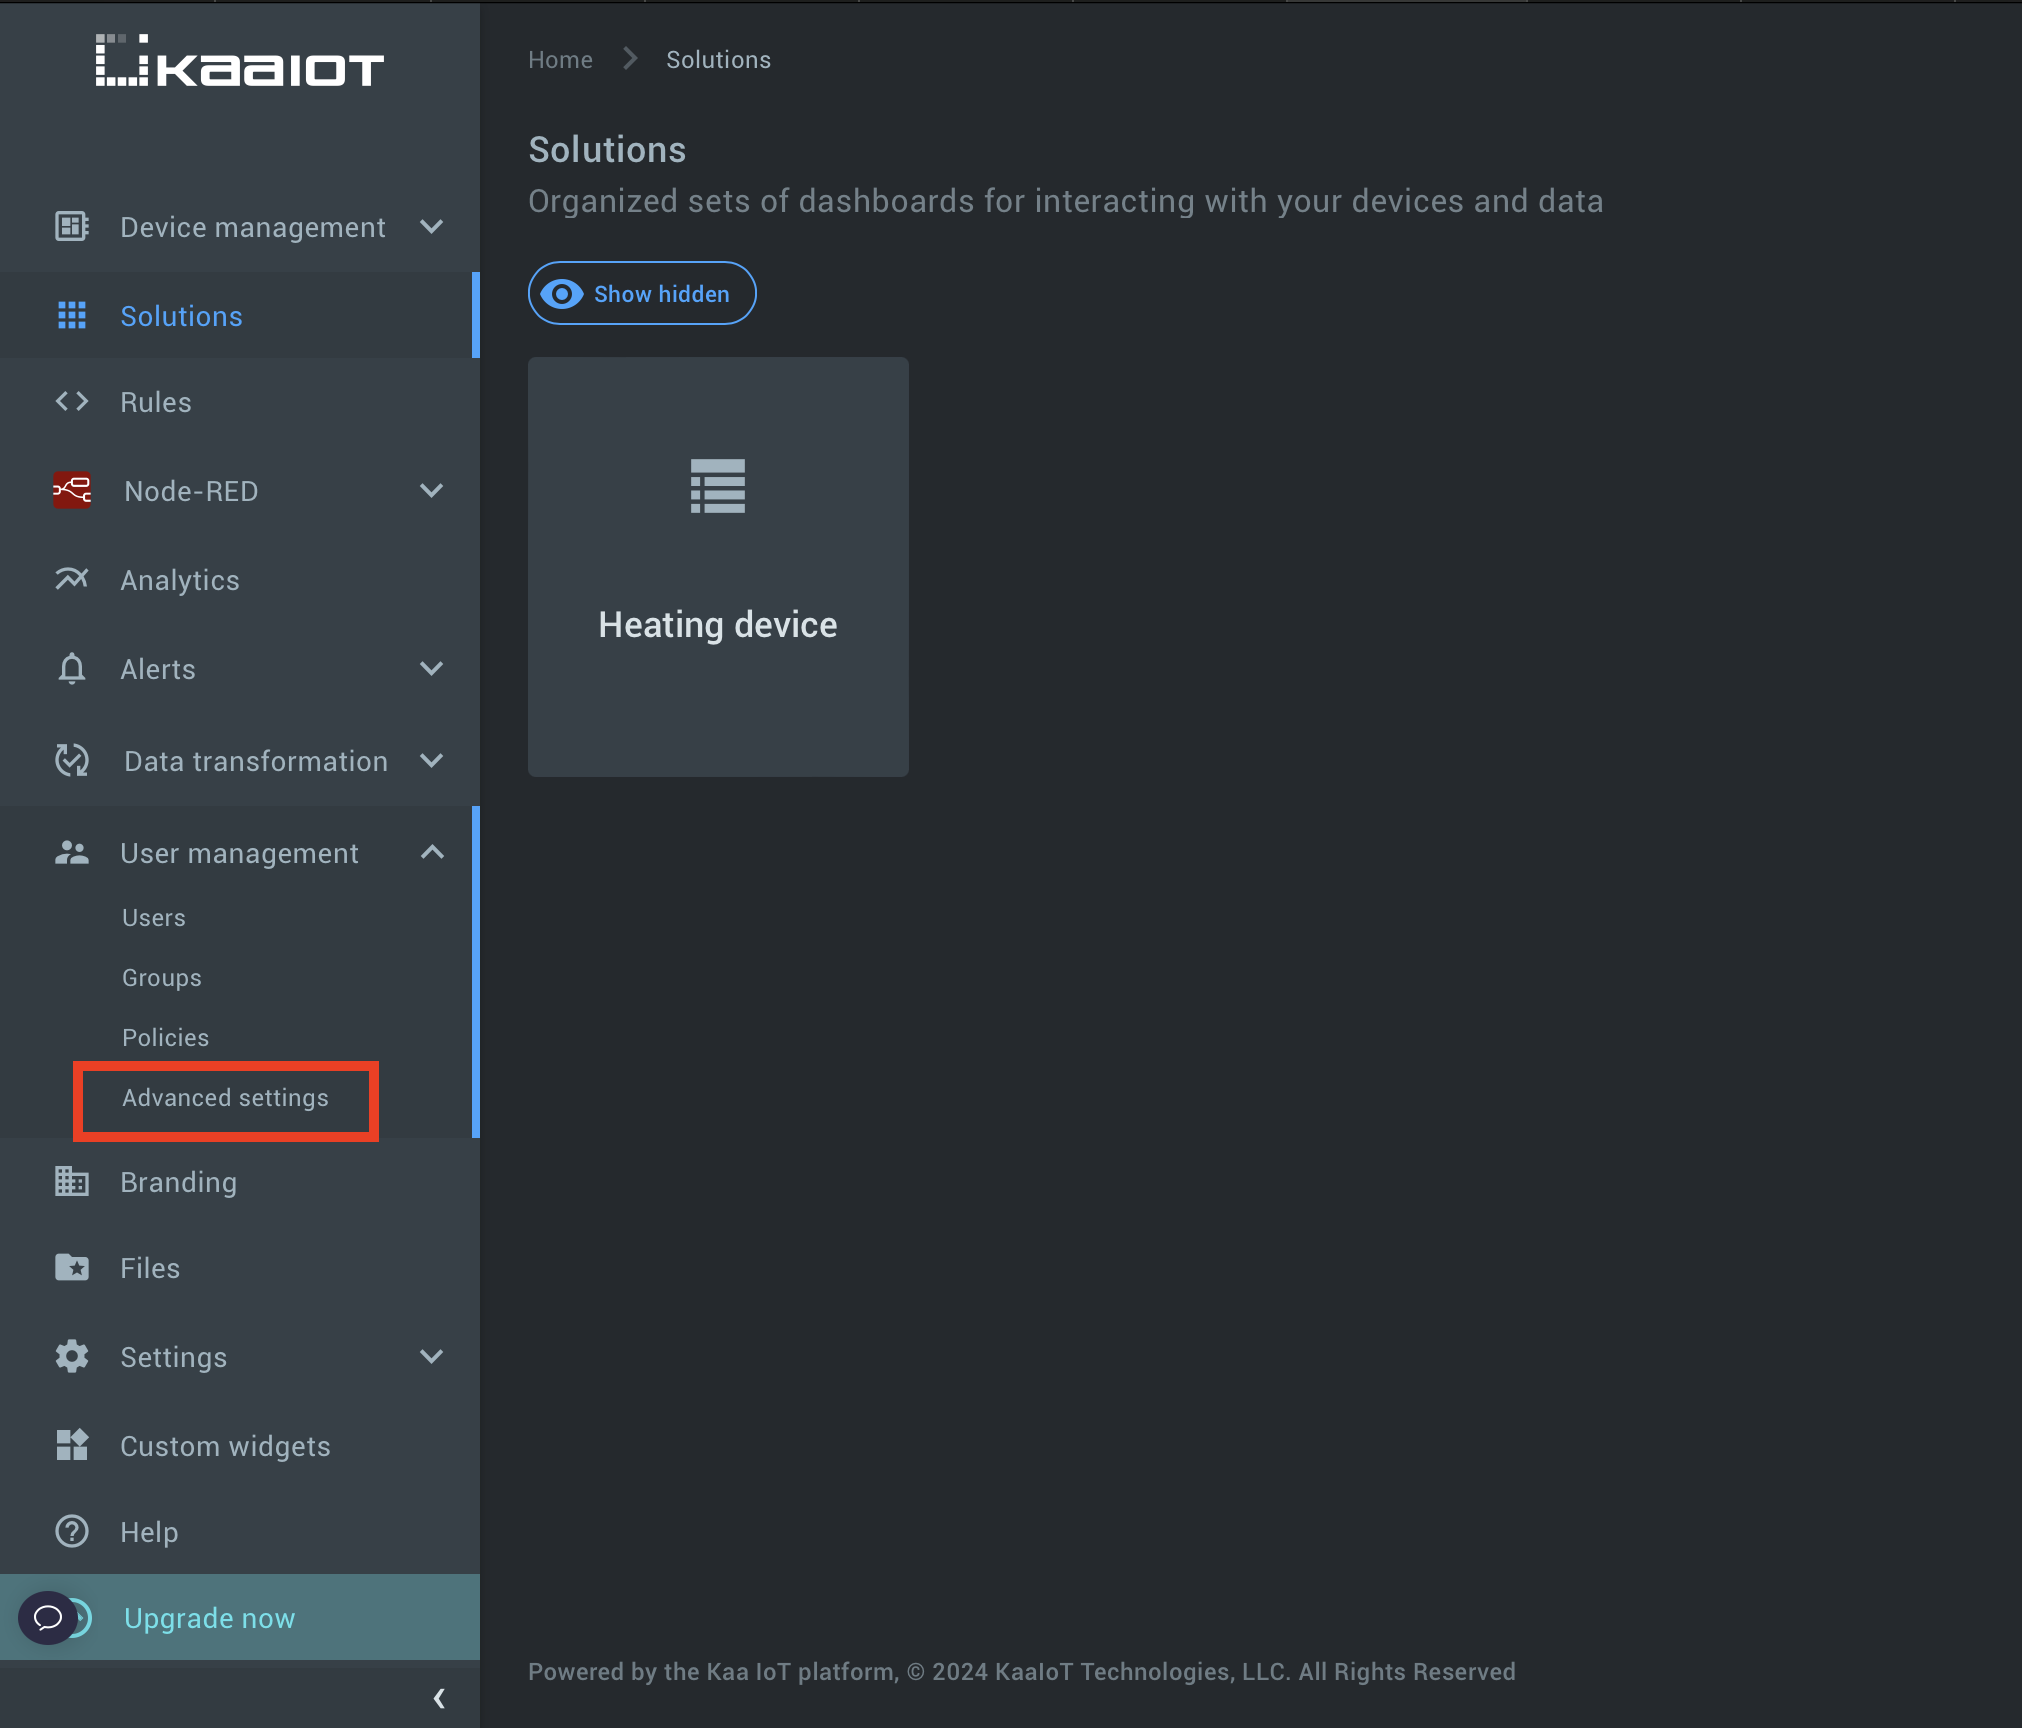
In the next steps, we'll acquire four essential parameters:
- Realm Name
- Client ID
- Client Secret
- Base URL
3. Copy Realm Name. Once you've copied the realm name, make sure to save it in a convenient location.
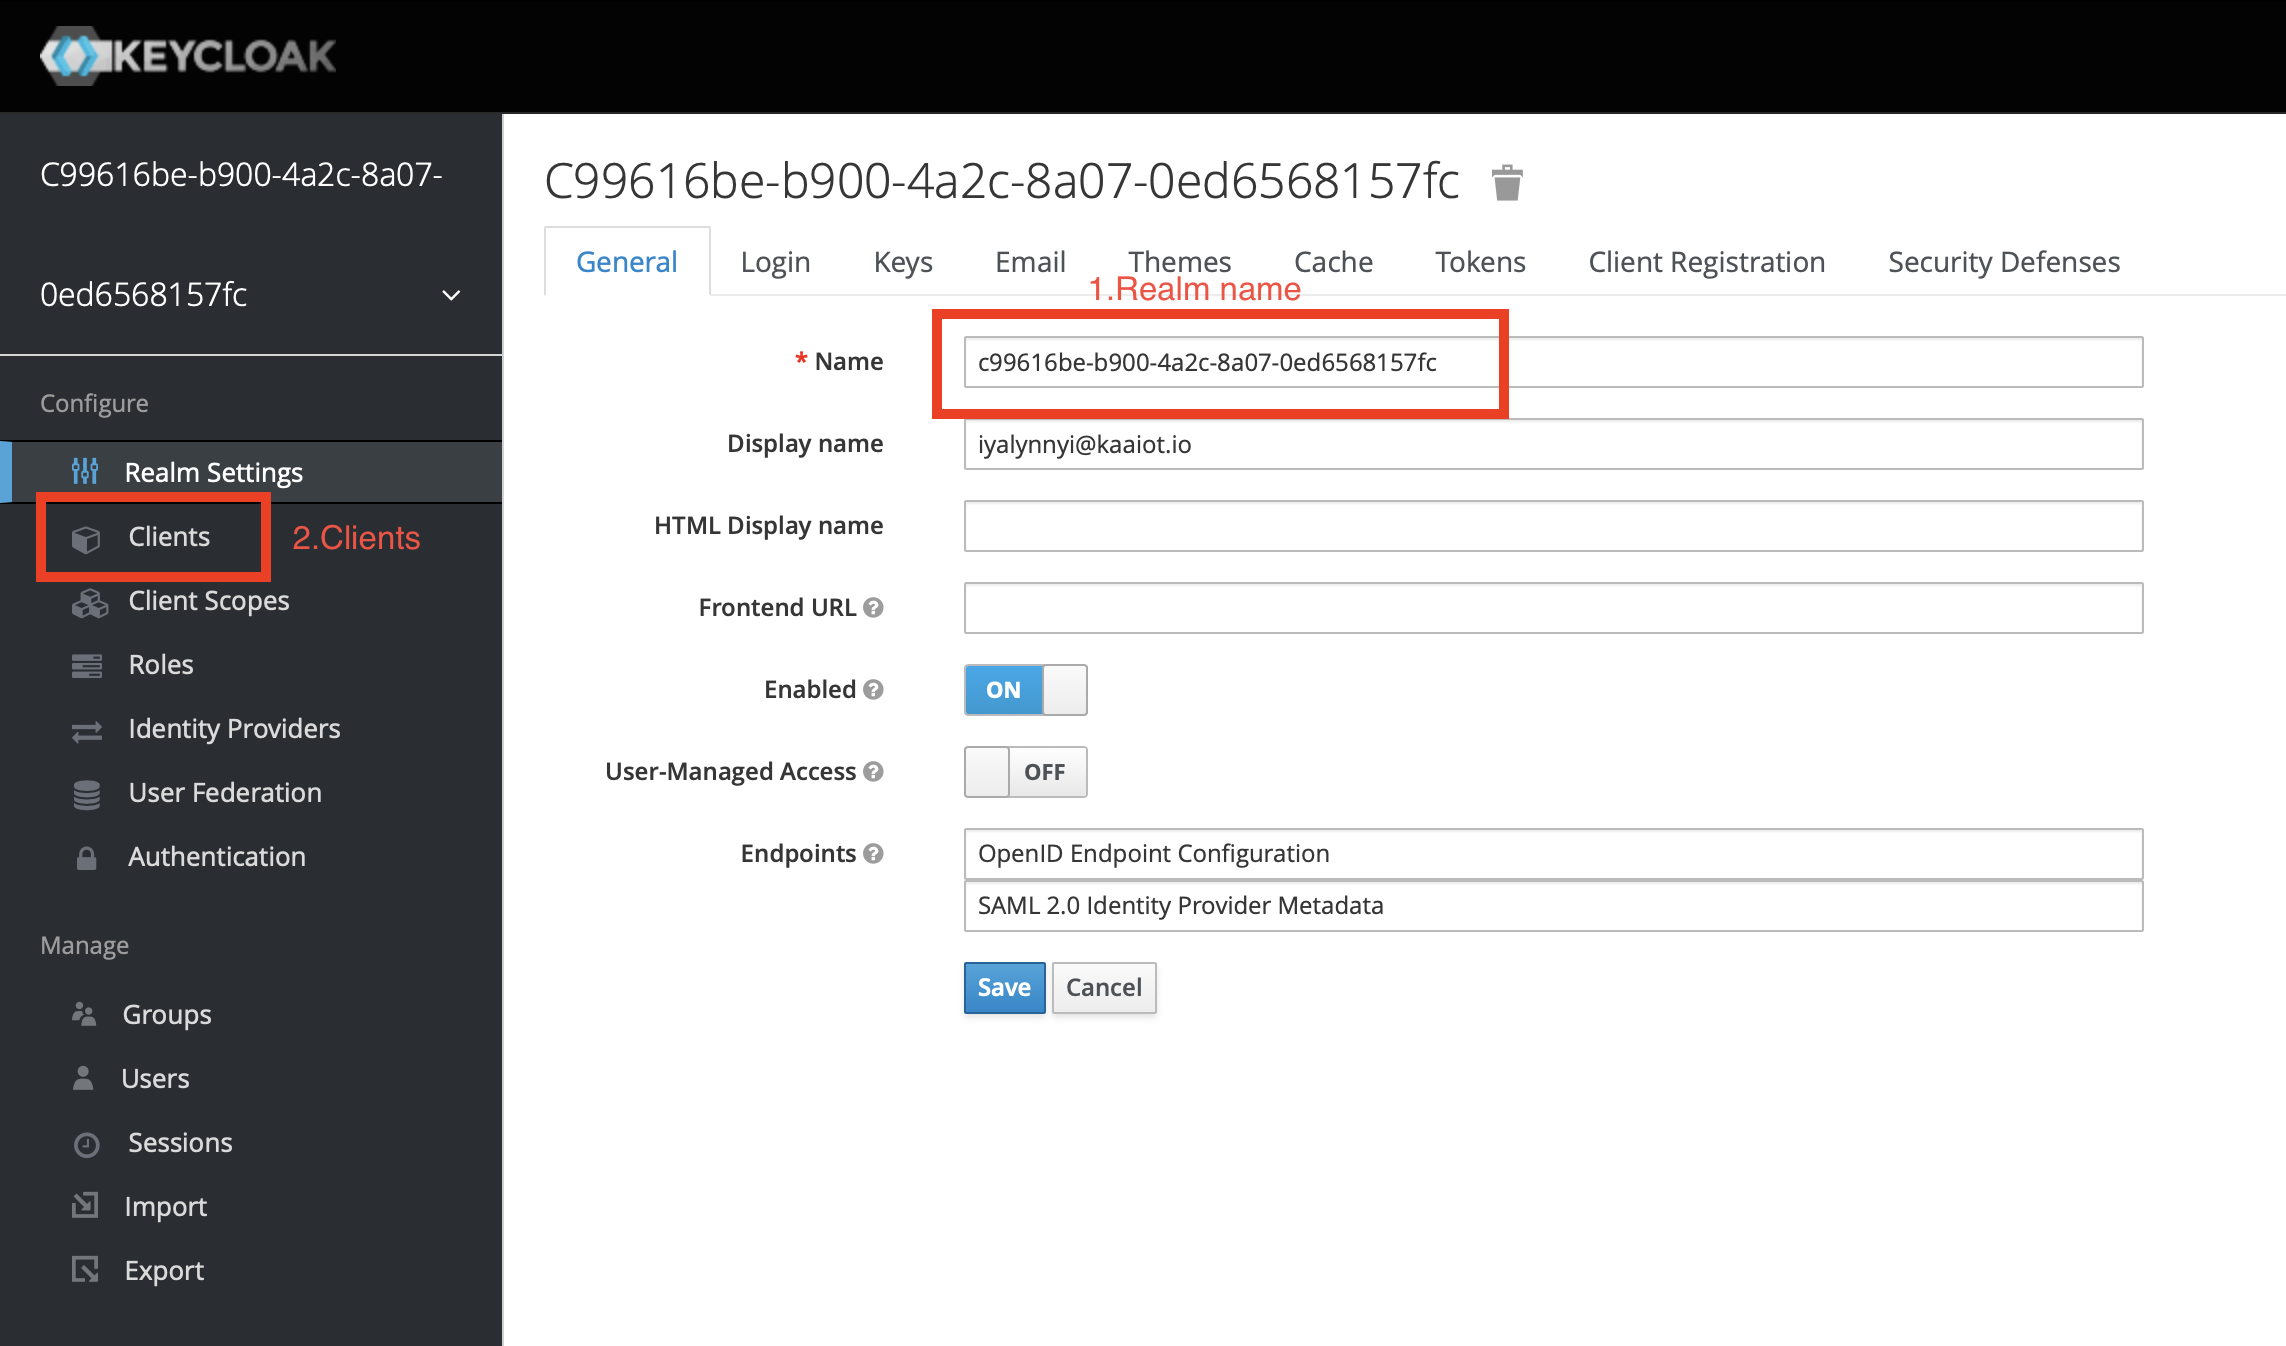
4. Click on the "Clients" tab. Within the list of clients, you'll observe multiple entries. Two of them have randomly generated IDs.
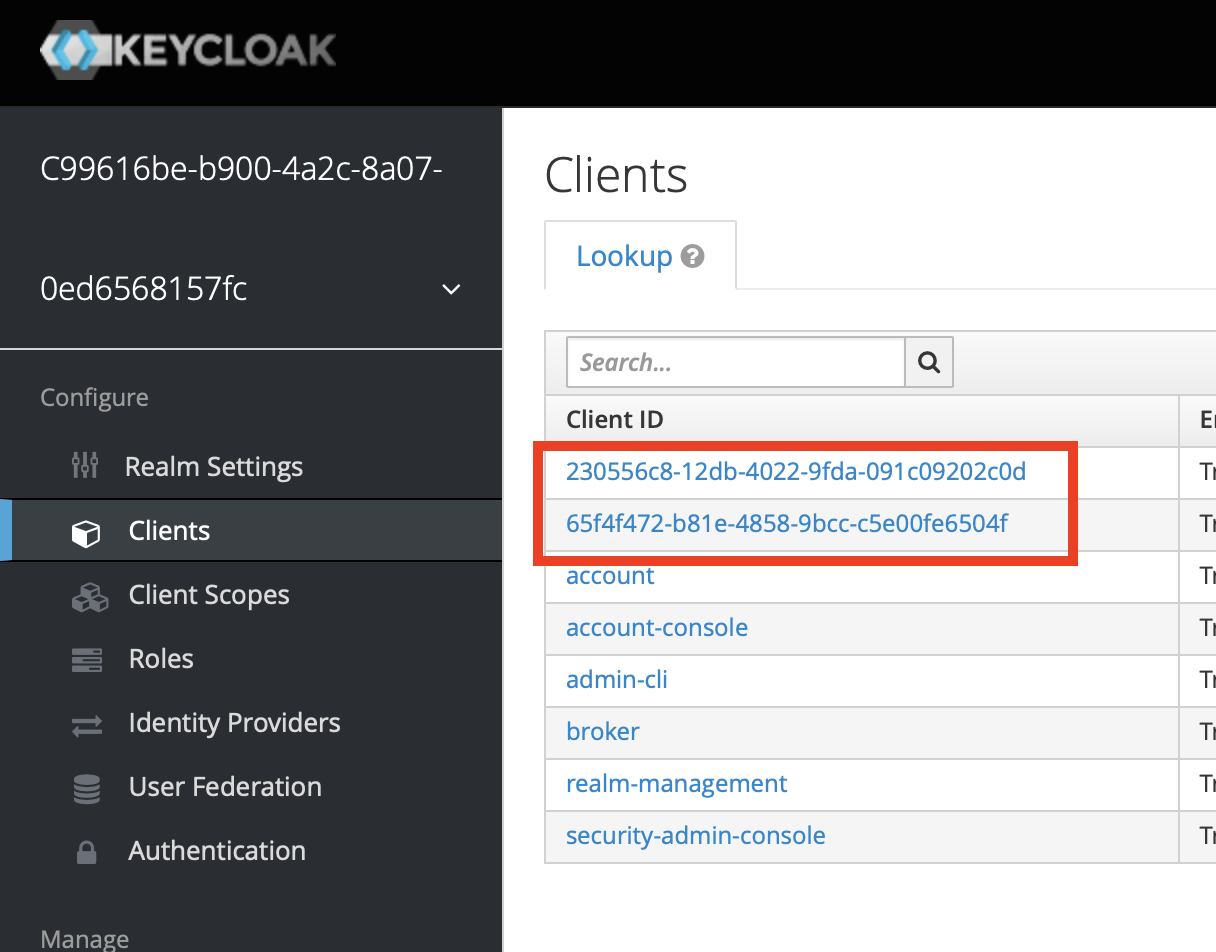
5. Navigate to each entry and find the one named "kaa-rest-api" and copy the Client ID
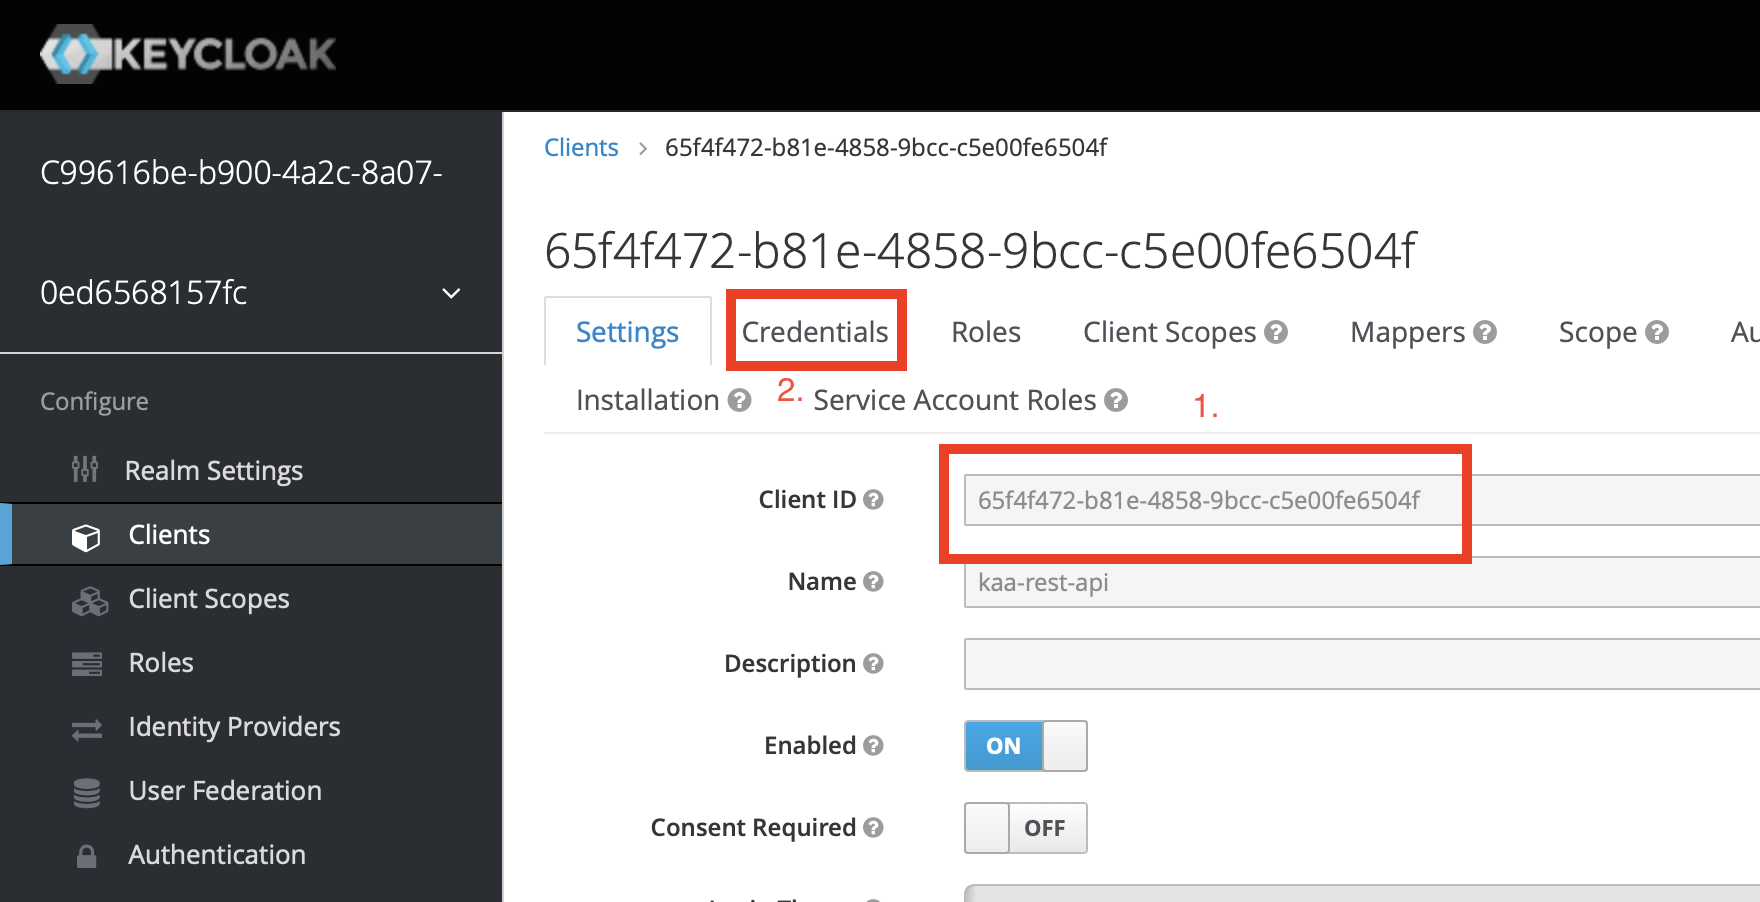
6. Go to the Credentials tab. Copy the Client Secret and Base URL
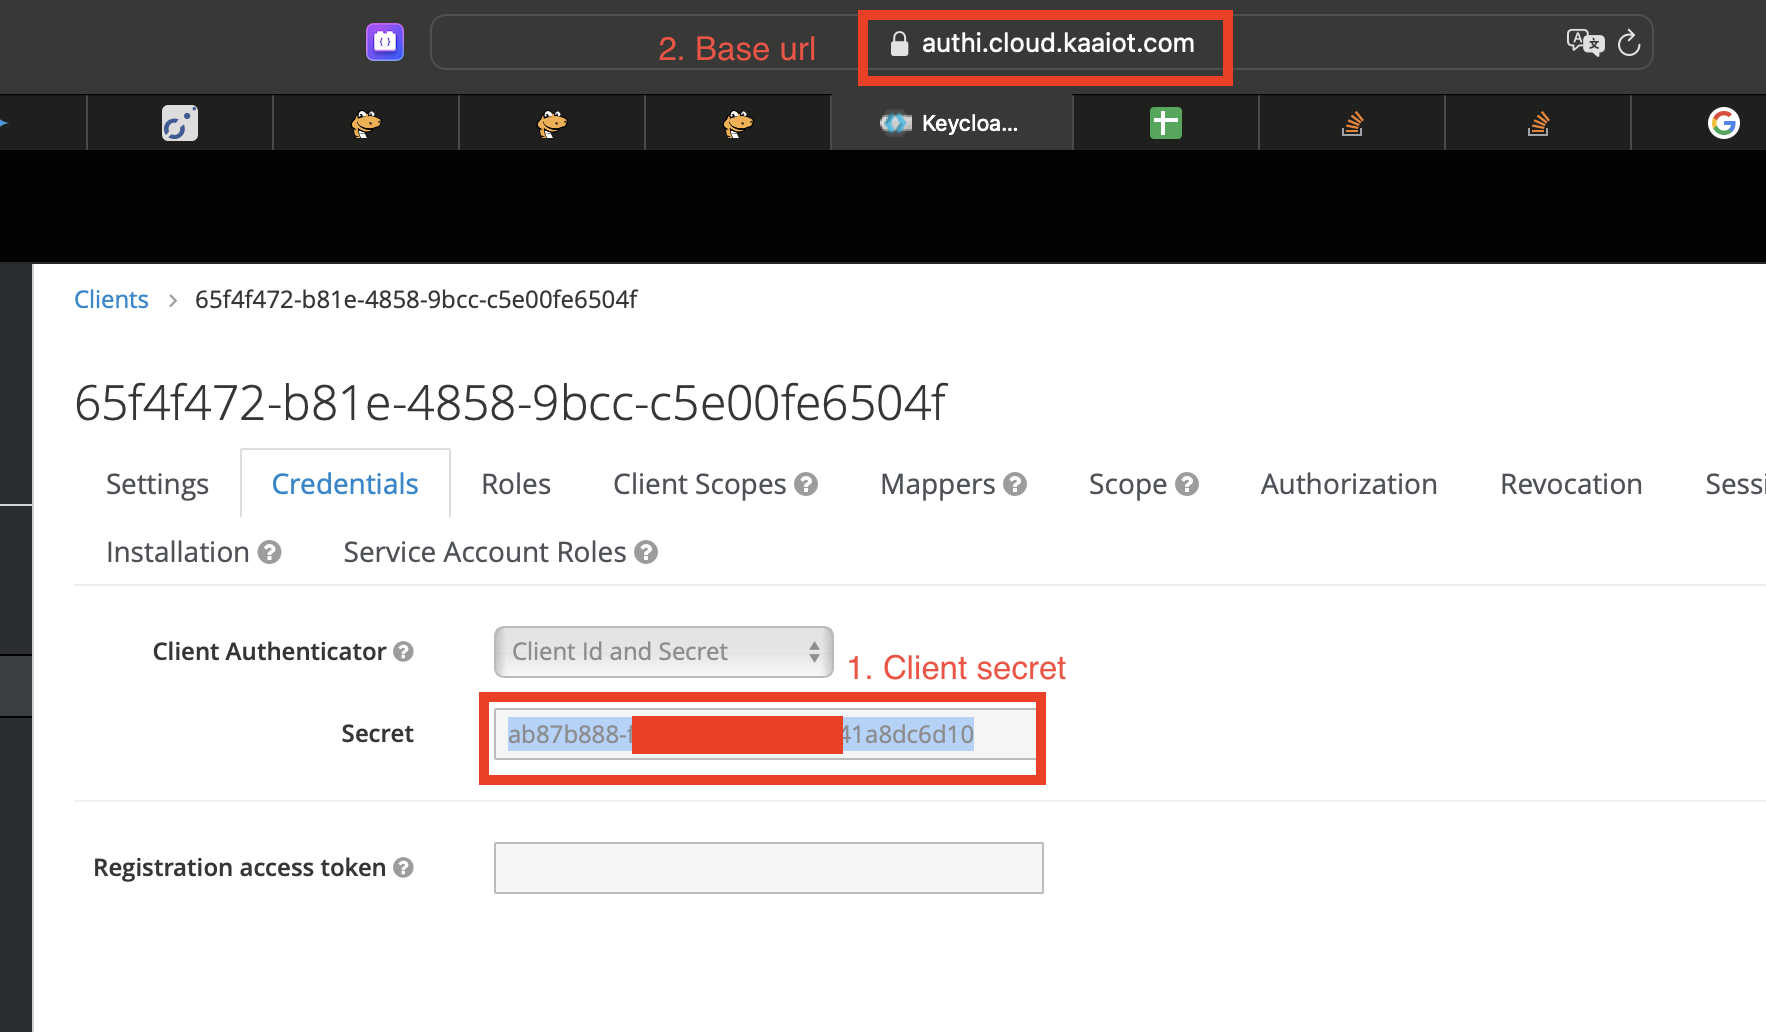
7. To get the token, we'll need to initiate a POST request on:
https://{{baseUrl}}/auth/realms/{{realm}}/protocol/openid-connect/token
Content type: application/x-www-form-urlencoded
Other parameters:
"grant_type": "client_credentials",
"client_id": {{client_id}},
"client_secret": {{client_secret}}
Receiving device data in Google Colab
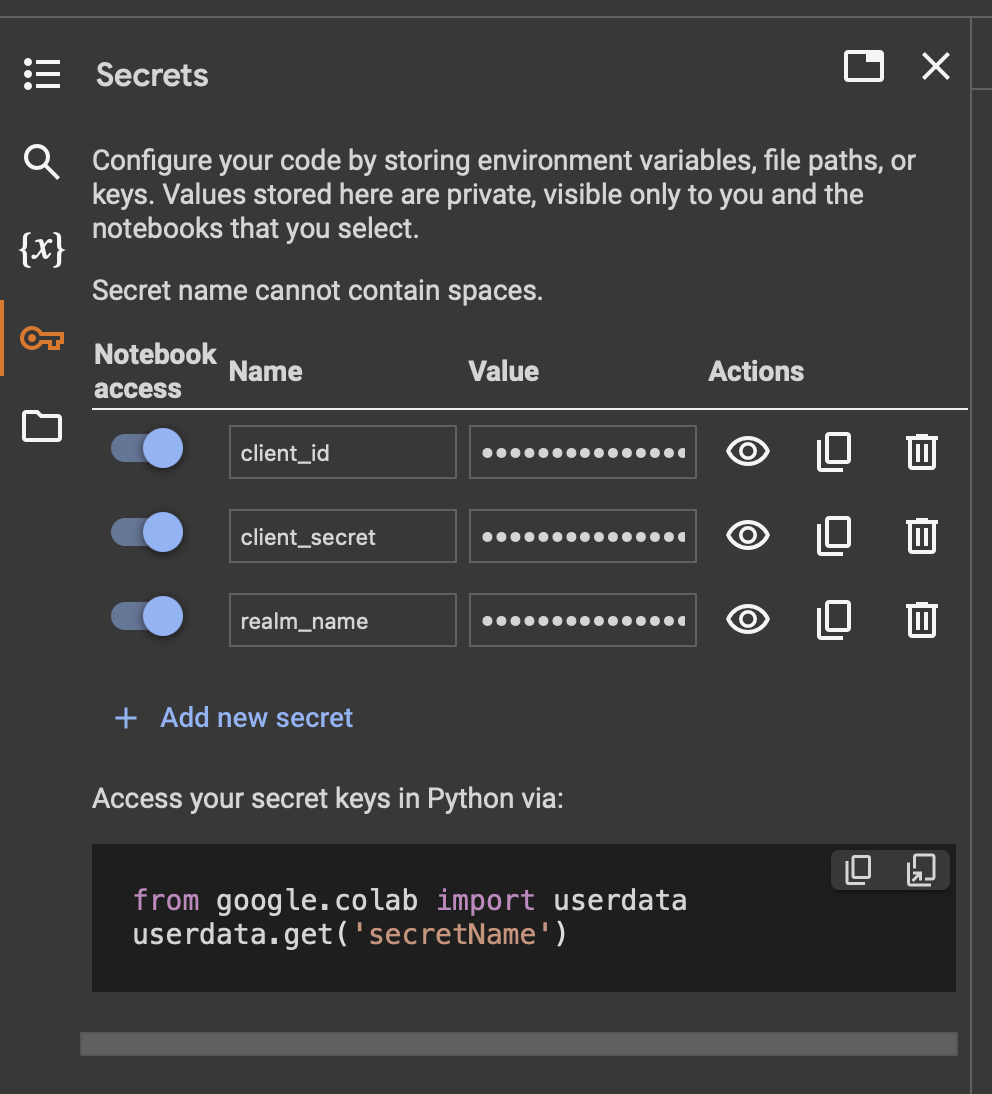
For security purposes, let's add sensitive parameters like Client ID and Client Secret to the Secrets section. Access the Secrets tab and input your secrets following the format displayed below.
Implementation
Let's kick off our implementation.
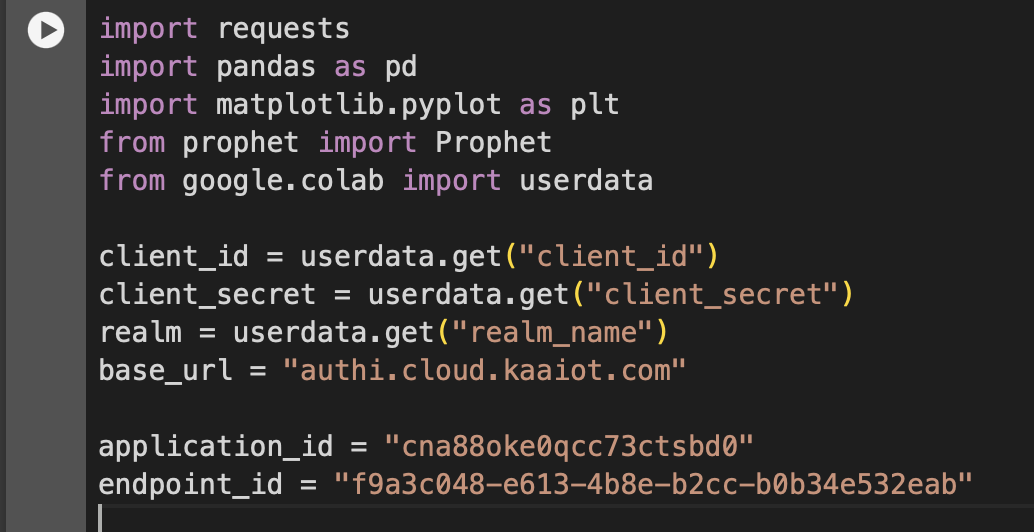
1. First, we'll import all the necessary data as well as userdata to utilize the secrets in our code. Then, we'll retrieve our secrets and declare the variables that we'll use later.
2. Following that, our initial step is to receive the token. You can refer to the example provided in the screenshot below for guidance.
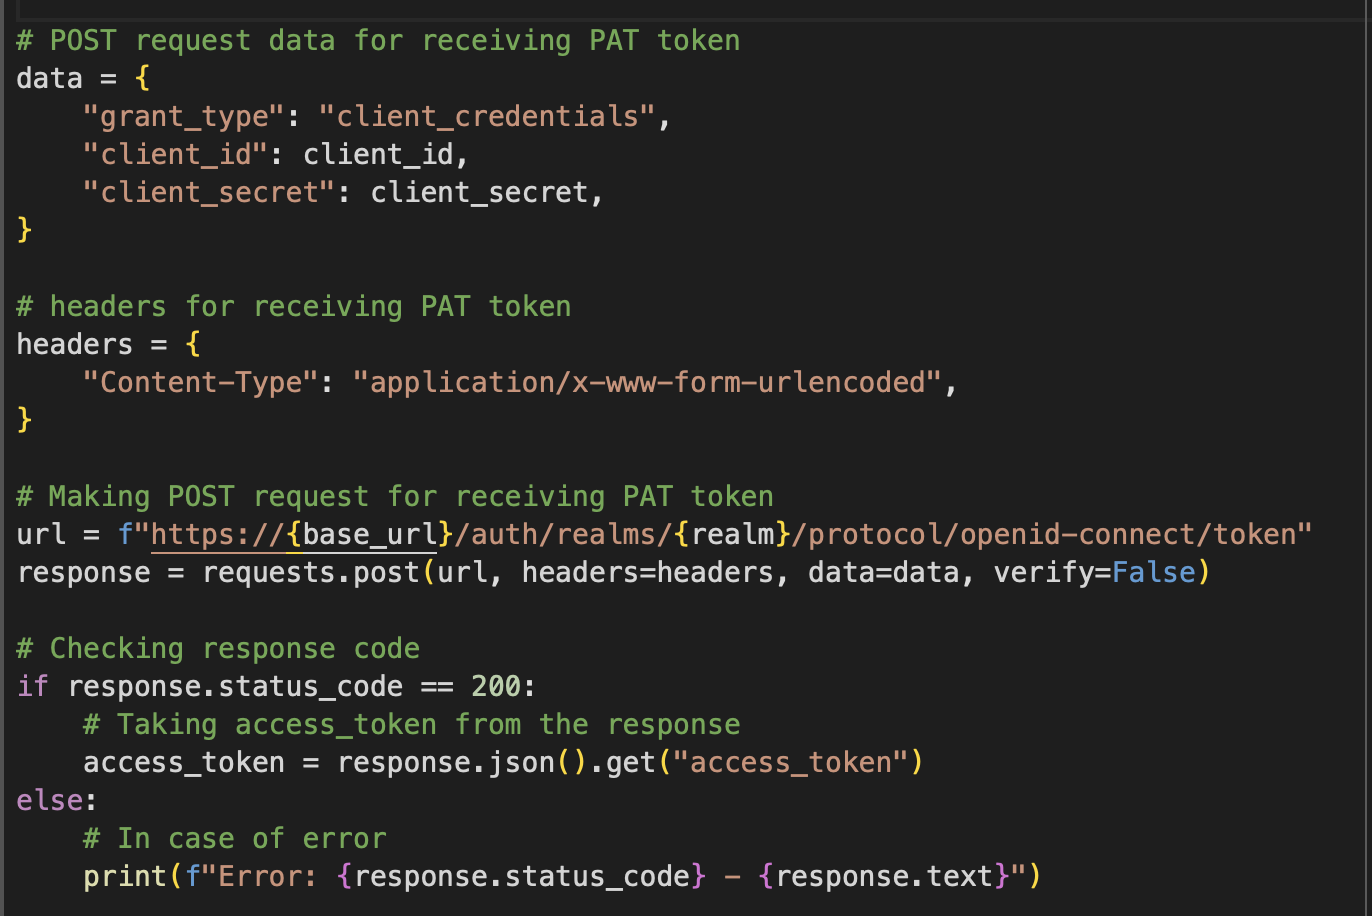
Now, when we have a token, we can get data from the device connected to the Kaa IoT platform.
To get the device's data, you can issue a GET request to the following endpoint:
https://cloud.kaaiot.com/epts/api/v1/applications/{application_id}/time-series/data
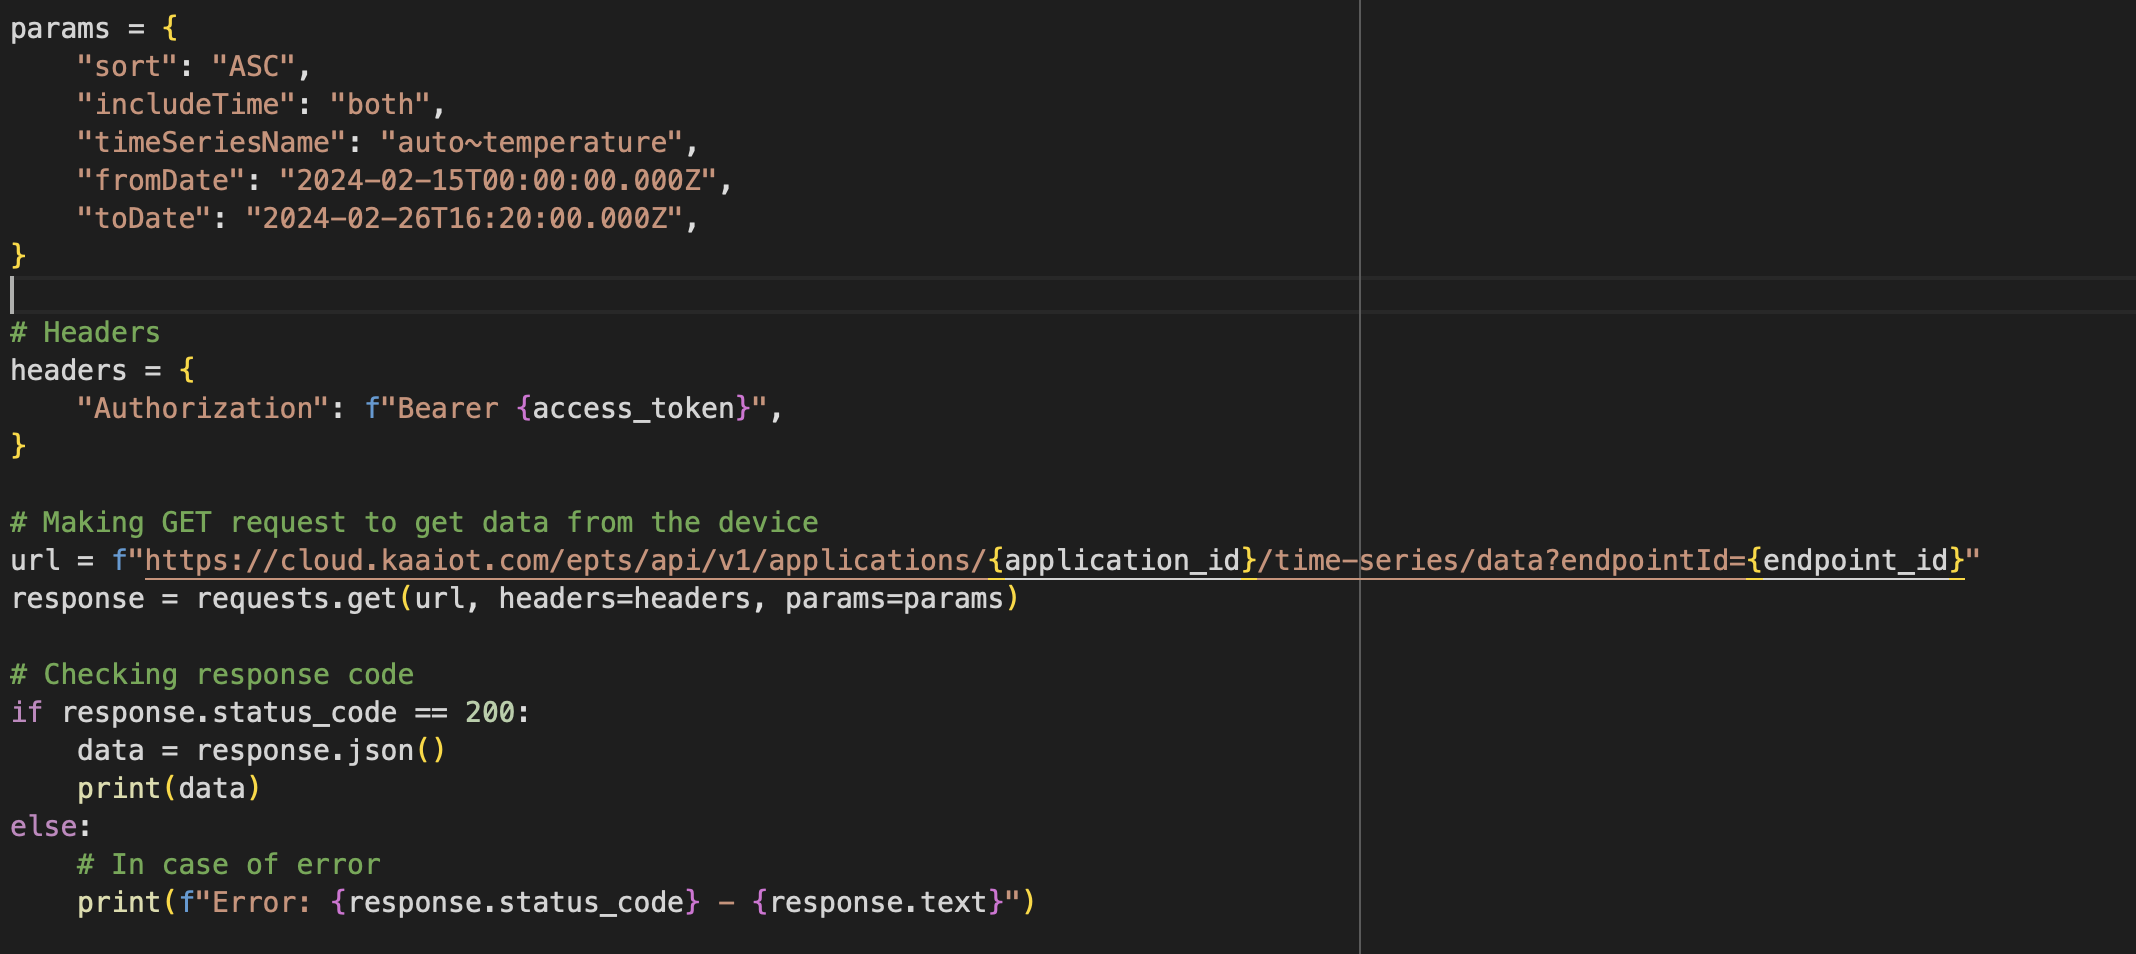
Ensure you provide the bearer token received in the previous step, along with the following query parameters:
- "sort": ASC/DESC
- "includeTime": from/to/both/none
- "timeSeriesName": {time series name}
- "fromDate": date and time of time series starting range in ISO8601 format, for example: "2024-02-15T00:00:00.000Z"
- "toDate": date and time of time series starting range in ISO8601 format, for example: "2024-02-26T16:20:00.000Z"
- "endpointId": endpoint ID of your device in the Kaa IoT platform
Below is an example code snippet:
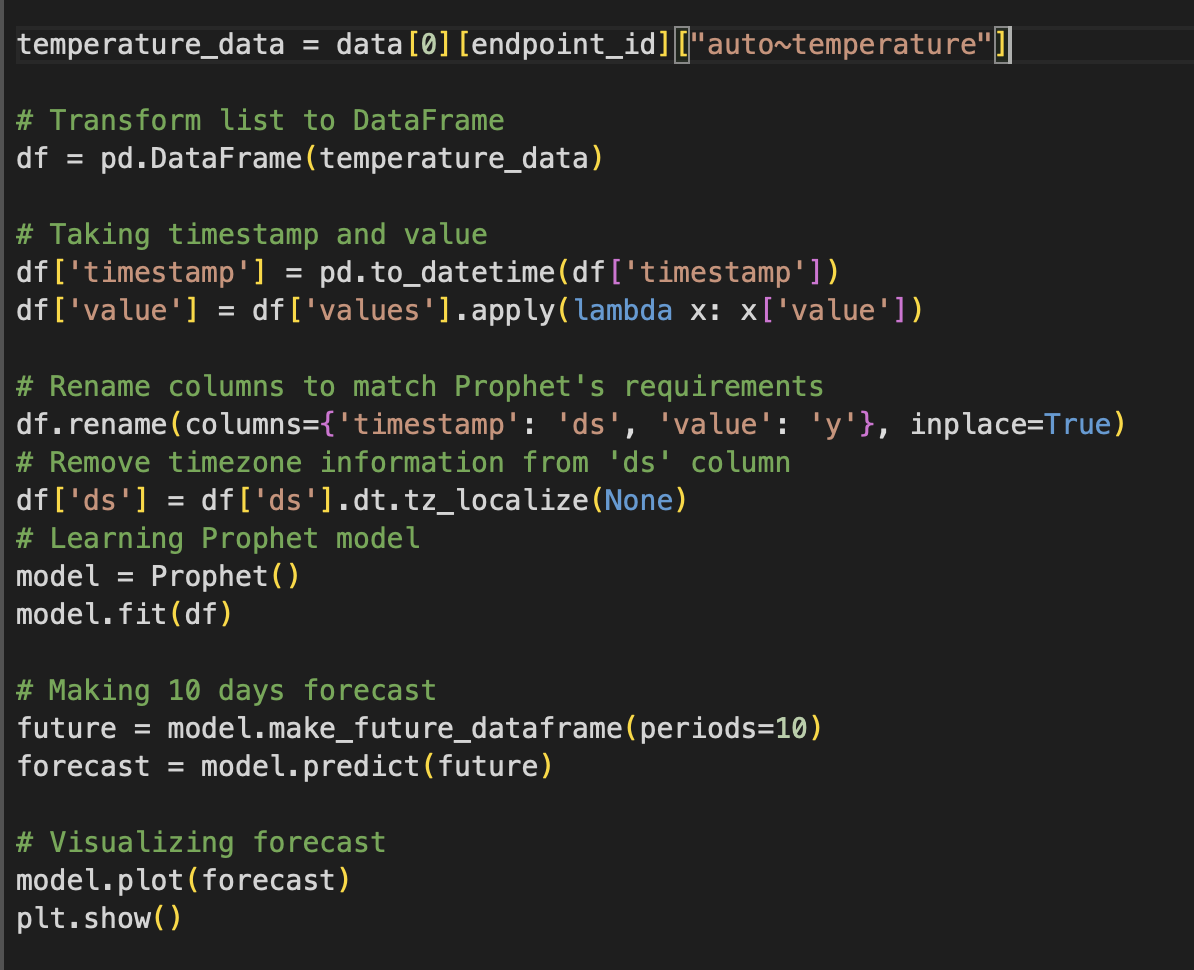
With the data at hand, we have the flexibility to manipulate it according to our needs. For example, let's explore forecasting temperatures using the Prophet AI model, which is freely available.
Here's a straightforward example of how to achieve this with the data we've obtained:
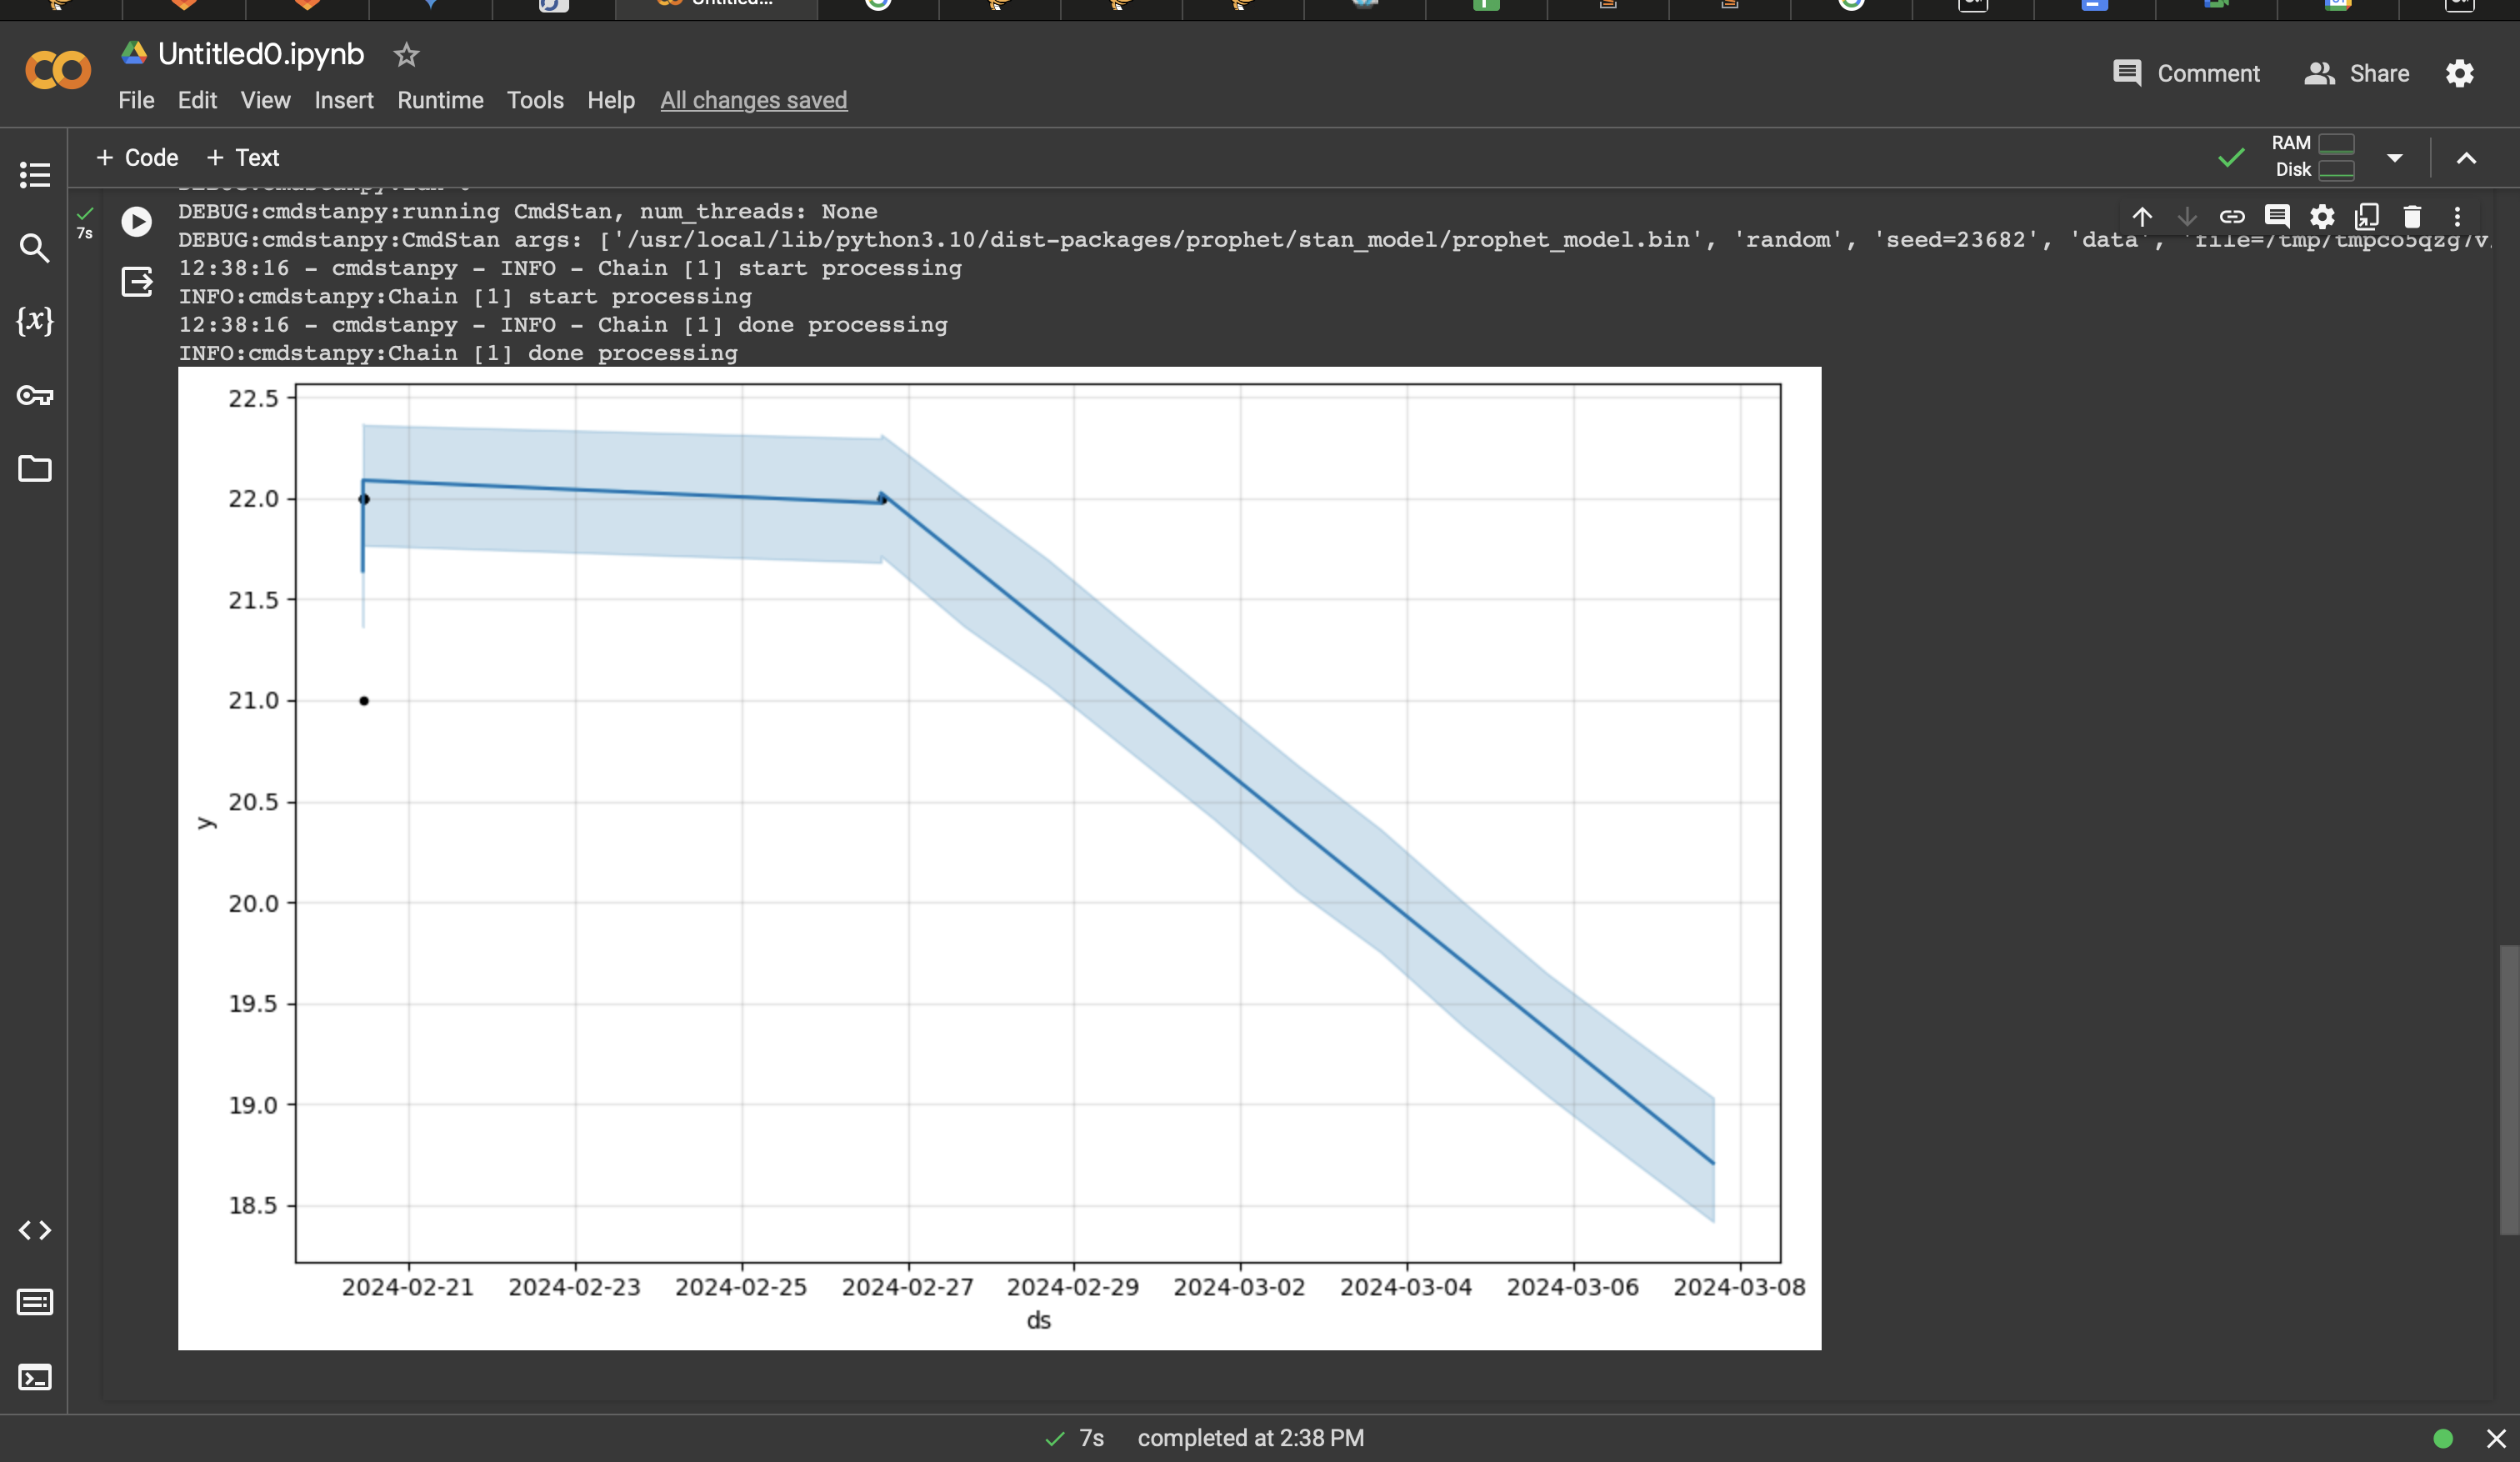
Now that the implementation is complete, we're ready to execute our code.
Result:
Final words
In conclusion, this tutorial has provided a comprehensive guide on connecting Google Colab to the Kaa IoT platform for efficient data analysis and device monitoring in IoT projects. By integrating these two powerful tools, developers can streamline their workflow and leverage the capabilities of Google Colab for data analysis, visualization, and machine learning tasks, while harnessing the robust infrastructure of the Kaa IoT platform for managing and analyzing device data.
Throughout the tutorial, we covered essential steps, including obtaining a Personal Access Token (PAT), retrieving device data, and even demonstrating how to utilize the "Prophet" forecasting model for temperature predictions. Following these steps will make it easy to connect your IoT devices to Google Colab and use advanced analytics to extract useful information from the collected data.
With this newfound knowledge, you are empowered to embark on innovative IoT projects, leveraging the synergy between Google Colab and KaaIoT to unlock the full potential of their devices and data. Happy coding!
Source code
import requests
import pandas as pd
import matplotlib.pyplot as plt
from prophet import Prophet
from google.colab import userdata


client_id = userdata.get("client_id")
client_secret = userdata.get("client_secret")
realm = userdata.get("realm_name")
base_url = "authi.cloud.kaaiot.com"


application_id = "cna88oke0qcc73ctsbd0"
endpoint_id = "f9a3c048-e613-4b8e-b2cc-b0b34e532eab"


# POST request data for receiving PAT token
data = {
"grant_type": "client_credentials",
"client_id": client_id,
"client_secret": client_secret,
}
# headers for receiving PAT token
headers = {
"Content-Type": "application/x-www-form-urlencoded",
}


# Making POST request for receiving PAT token
url = f"https://{base_url}/auth/realms/{realm}/protocol/openid-connect/token"
response = requests.post(url, headers=headers, data=data, verify=False)


# Checking response code
if response.status_code == 200:
# Taking access_token from the response
access_token = response.json().get("access_token")
else:
# In case of error
print(f"Error: {response.status_code} - {response.text}")


params = {
"sort": "ASC",
"includeTime": "both",
"timeSeriesName": "auto~temperature",
"fromDate": "2024-02-15T00:00:00.000Z",
"toDate": "2024-02-26T16:20:00.000Z",
}


# Headers
headers = {
"Authorization": f"Bearer {access_token}",
}


# Making GET request to get data from the device
url = f"https://cloud.kaaiot.com/epts/api/v1/applications/{application_id}/time-series/data?endpointId={endpoint_id}"
response = requests.get(url, headers=headers, params=params)


# Checking response code
if response.status_code == 200:
data = response.json()
print(data)
else:
# In case of error
print(f"Error: {response.status_code} - {response.text}")


temperature_data = data[0][endpoint_id]["auto~temperature"]


# Transform list to DataFrame
df = pd.DataFrame(temperature_data)


# Taking timestamp and value
df['timestamp'] = pd.to_datetime(df['timestamp'])
df['value'] = df['values'].apply(lambda x: x['value'])


# Rename columns to match Prophet's requirements
df.rename(columns={'timestamp': 'ds', 'value': 'y'}, inplace=True)
# Remove timezone information from 'ds' column
df['ds'] = df['ds'].dt.tz_localize(None)
# Learning Prophet model
model = Prophet()
model.fit(df)


# Making 10-day forecast
future = model.make_future_dataframe(periods=10)
forecast = model.predict(future)


# Visualizing forecast
model.plot(forecast)
plt.show()
Related Stories
KaaIoT & TEKTELIC partner to simplify IoT development with pre-integrated hardware & software solutions....
KaaIoT and Supermicro offer a combined solution for AI-powered IoT applications at the network's edge...

Uncover the potential benefits of machine condition monitoring in reducing downtime and increasing overall productivity...

Unlock insights into challenges, best practices & solutions for seamless IoT device management with our in-depth guide.