Basic Geofence Zone In/Out with Reverse Geocoding: Kaa Tutorial
In the location-based services world, geofencing and reverse geocoding are invaluable tools for businesses and developers. Geofencing allows the creation of virtual boundaries that trigger actions when devices enter or exit predefined areas, while reverse geocoding enables the translation of geographic coordinates into human-readable addresses.
Are you new to working with basic Geofence zones and reverse geocoding? In this walk-through, our engineer will guide you through a Fleet management template example of how to set up a rule to monitor when a vehicle enters or leaves a zone based on reported coordinates. A step-by-step guide by our engineer will make this journey easier for you.
Don’t forget, before getting started in the tutorial, you must log in to the Kaa Cloud. If you haven’t already signed up, try our Kaa Cloud free trial.
Basic vehicle simulation example from the Fleet management template
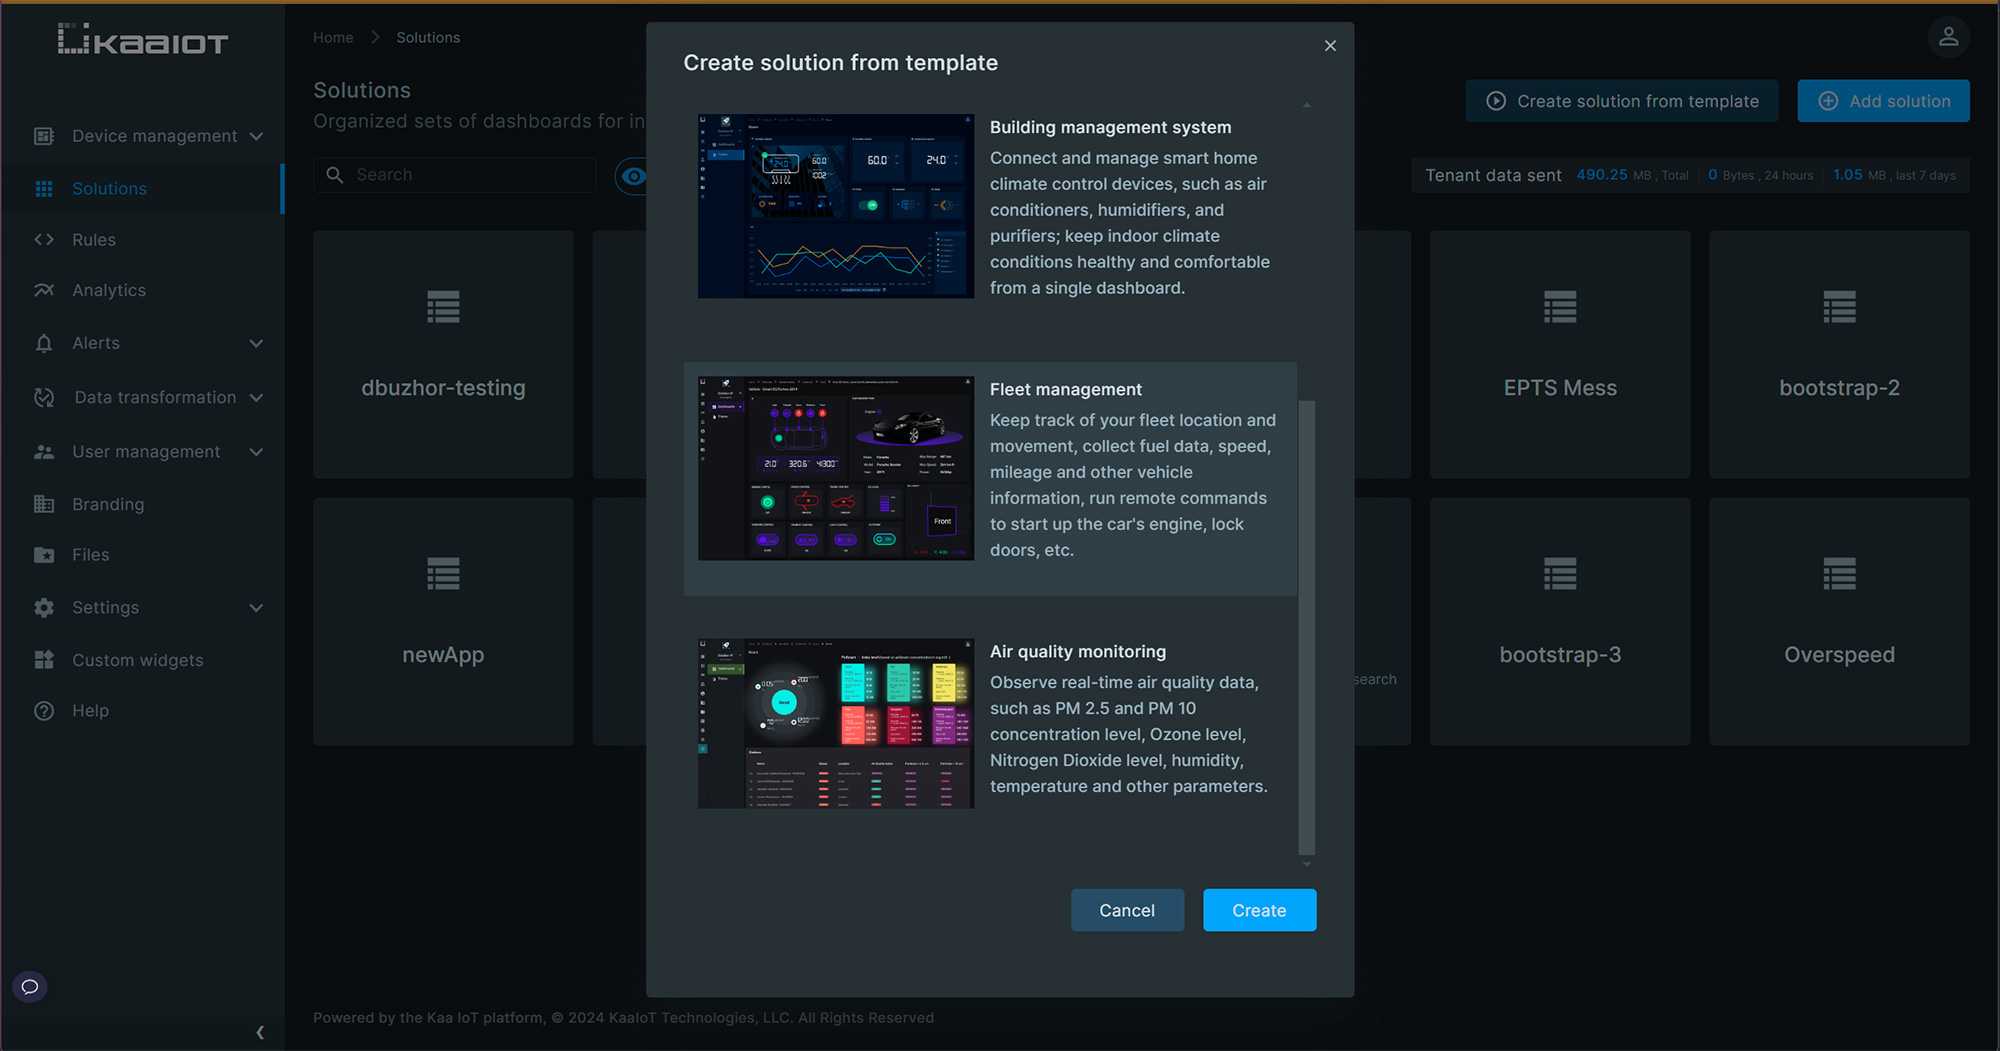
In this guide, as an example, we will use the Fleet management template, which includes basic vehicle simulation based on a single endpoint that includes different metrics like speed, rpm, and location. For a better understanding of what you can master with Kaa Cloud, take a look at our live fleet management dashboard.
Also, don’t forget to look through our live IoT dashboards.
You can find this template on Solutions -> Create a solution from the template.
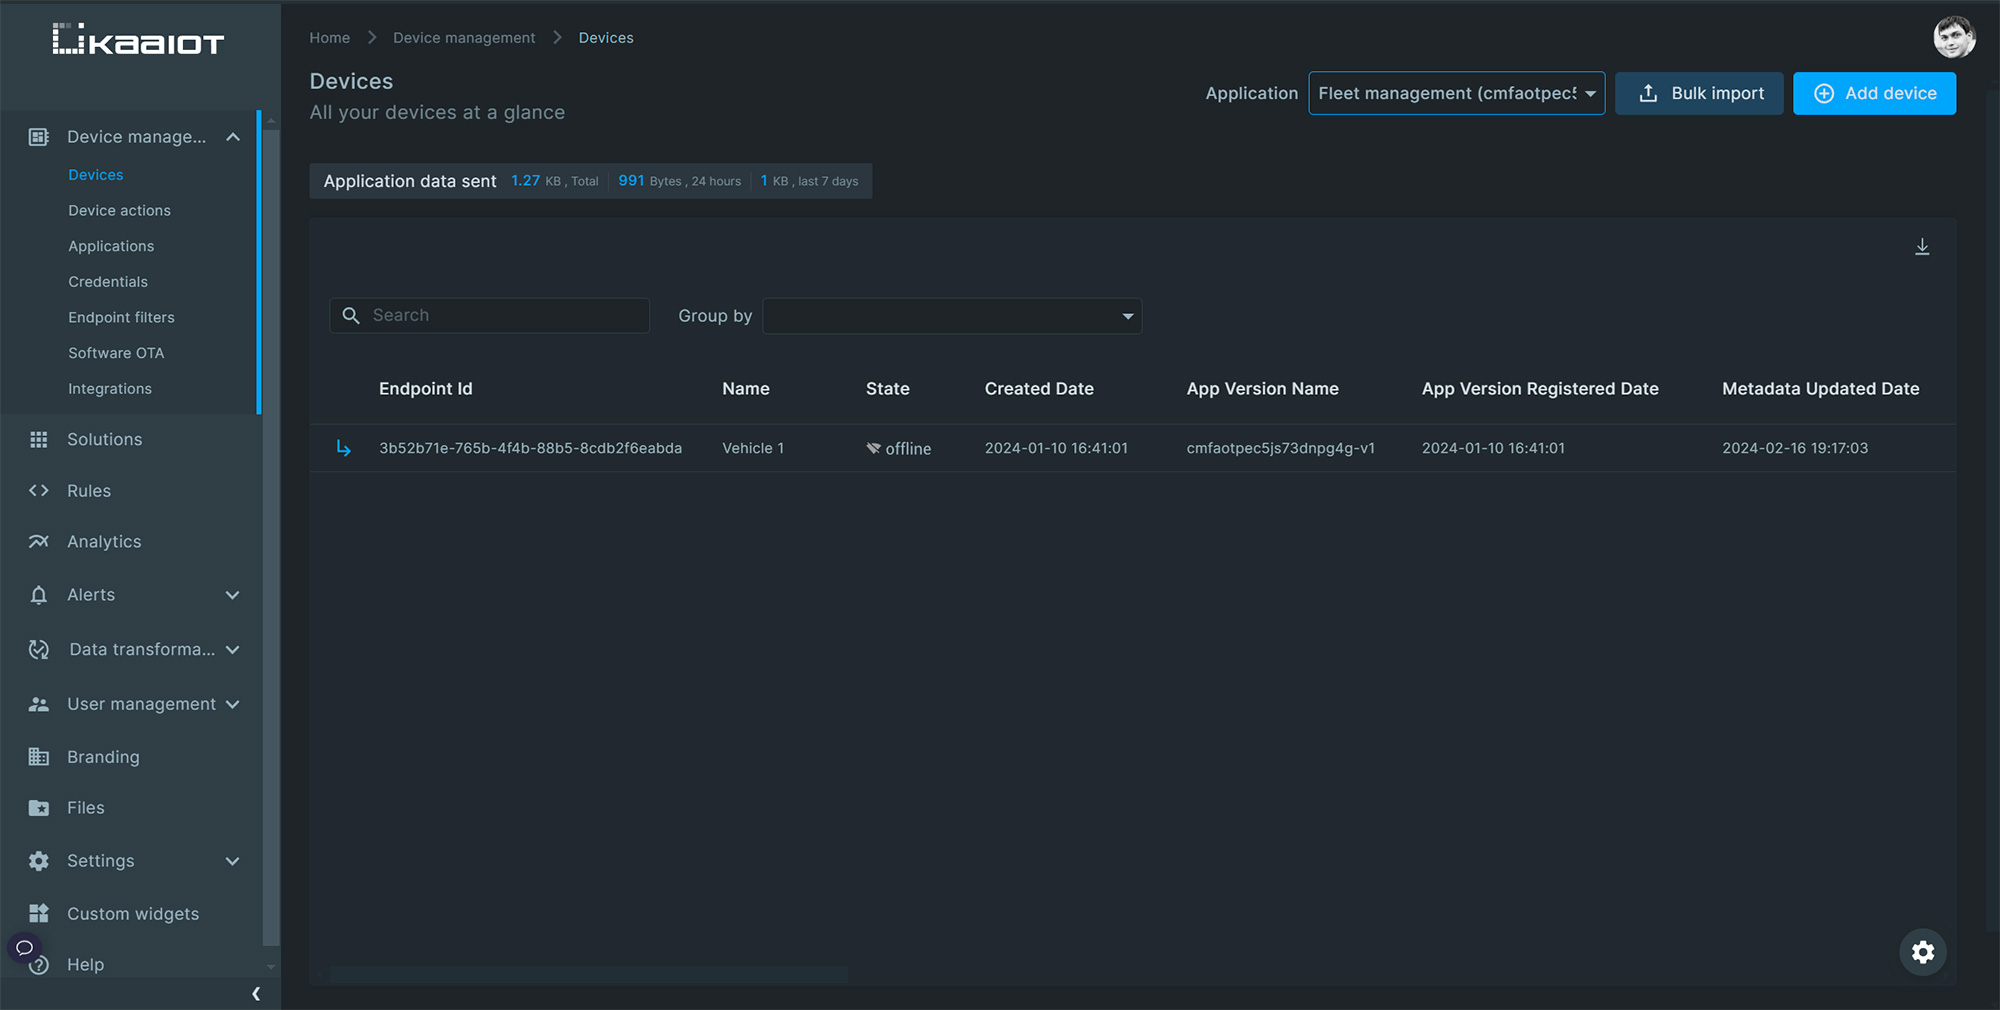
After adding the template, we can go to the fleet management Application (Device management -> Devices -> Fleet management) and find our Endpoint.
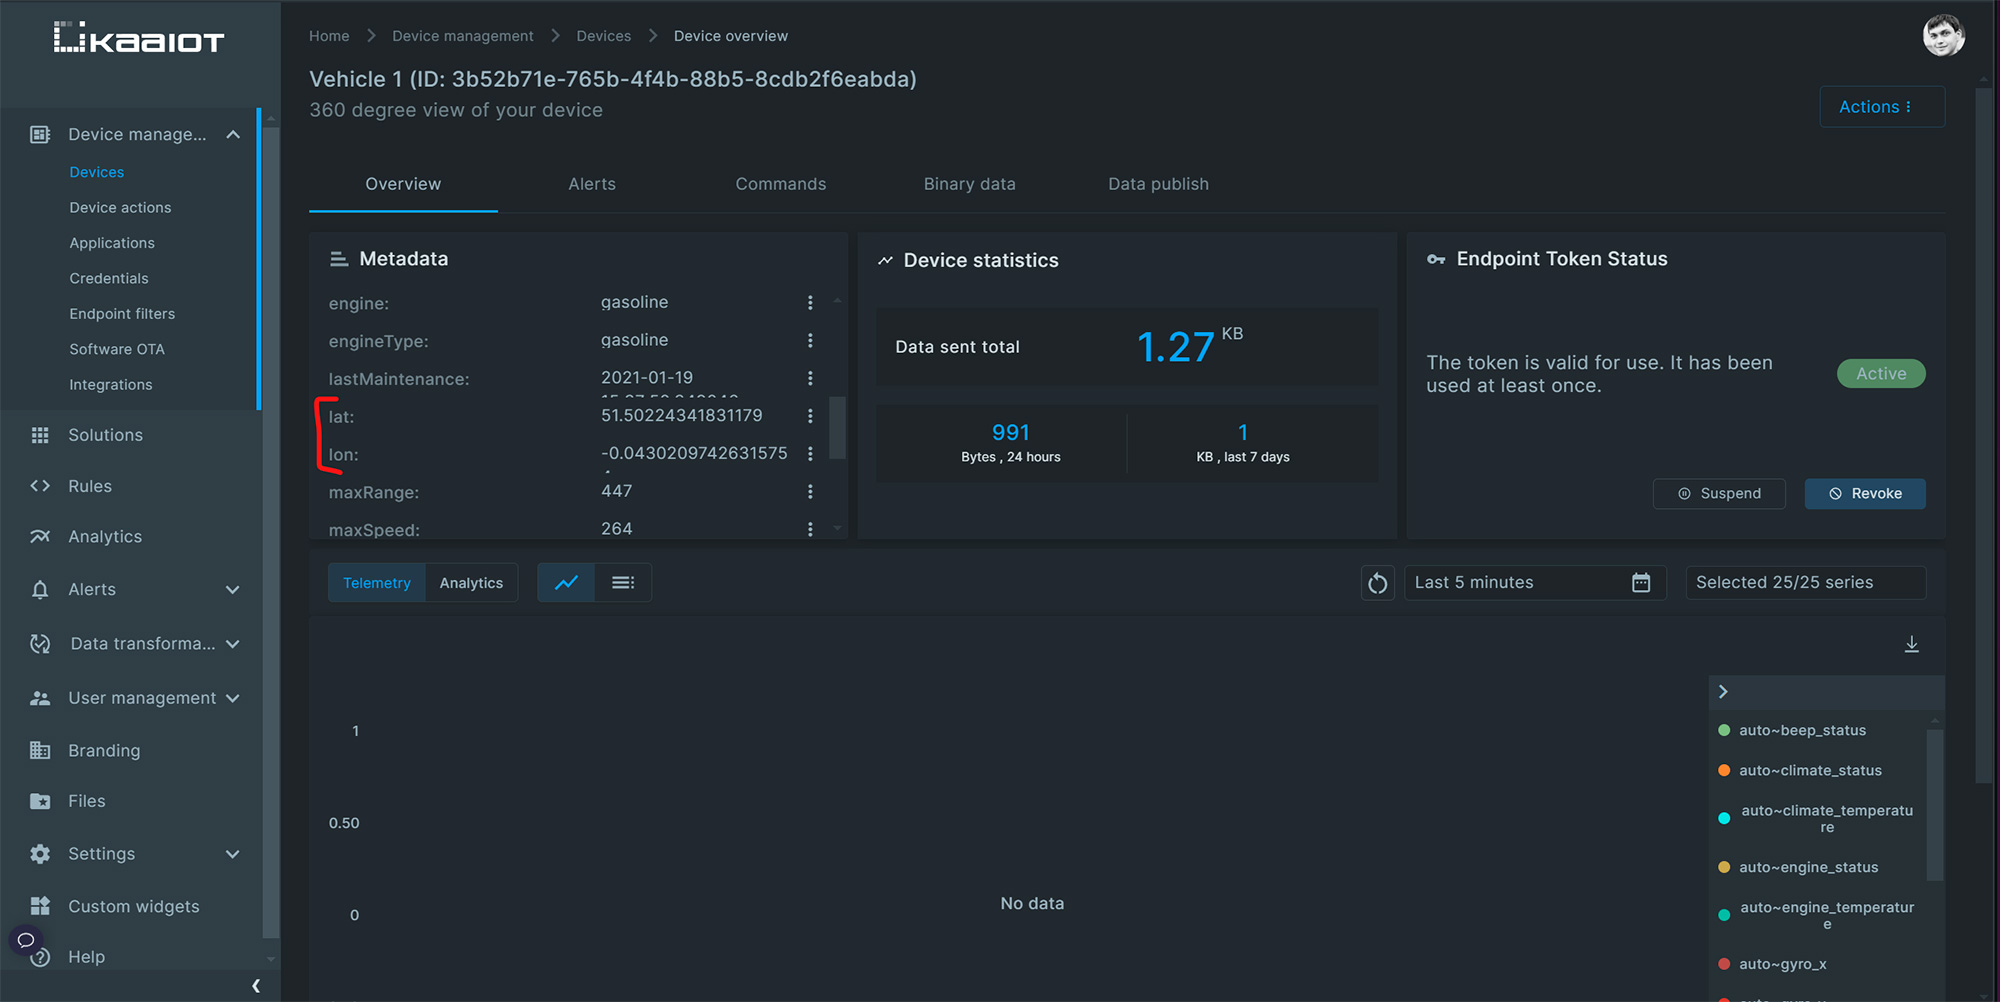
Start by discovering the endpoint Metadata. You will find 2 metadata keys that represent location lat and lon, as you can see in the screenshot below.
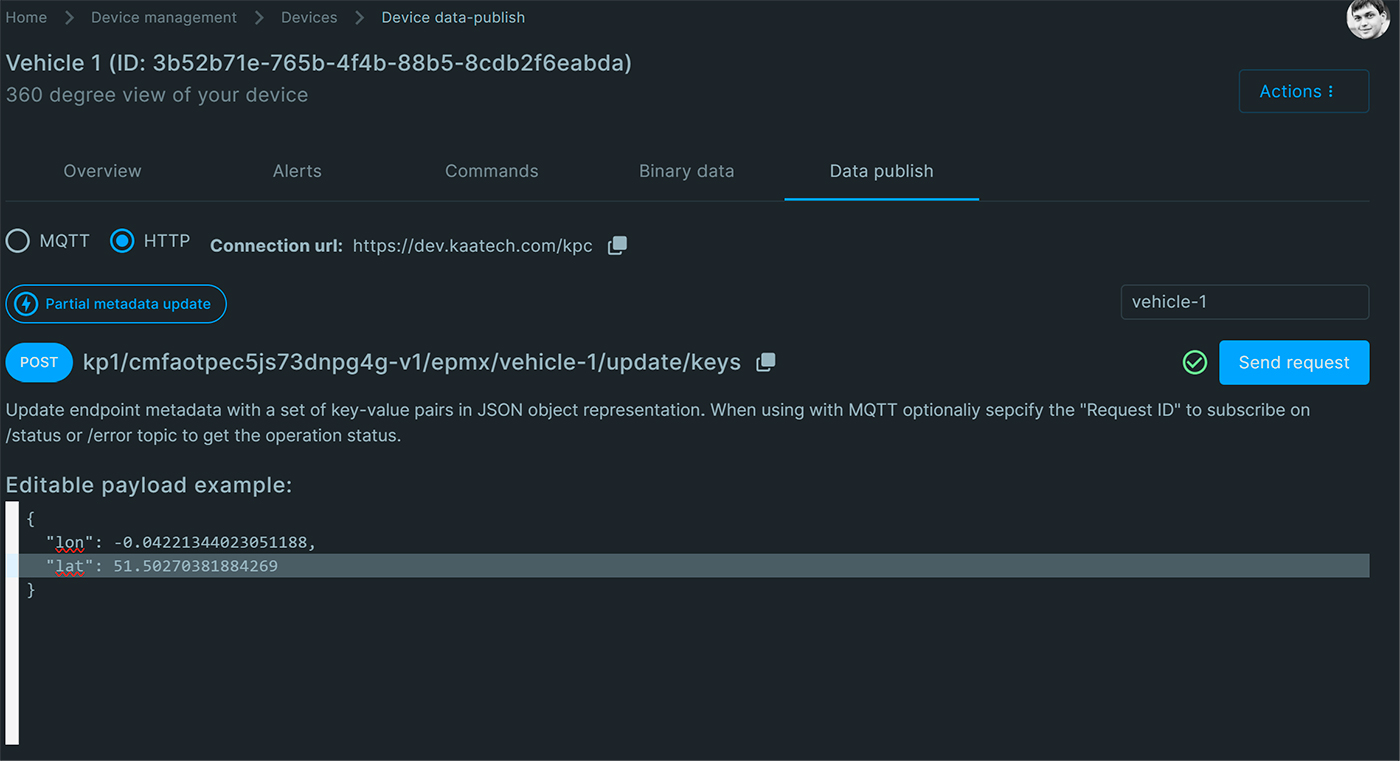
We will use the Data publish tab to move the coordinates, which will simplify the testing of our future rule and also help to test any position that we need. Go to the Data publish tab and select:
- HTTP
- Specify your device token by default vehicle-1
- Select Partial metadata update
- Change payload with new JSON that will include current values of lat and lon
{
  "lon": -0.04302097426315754,
  "lat": 51.50224341831179
}
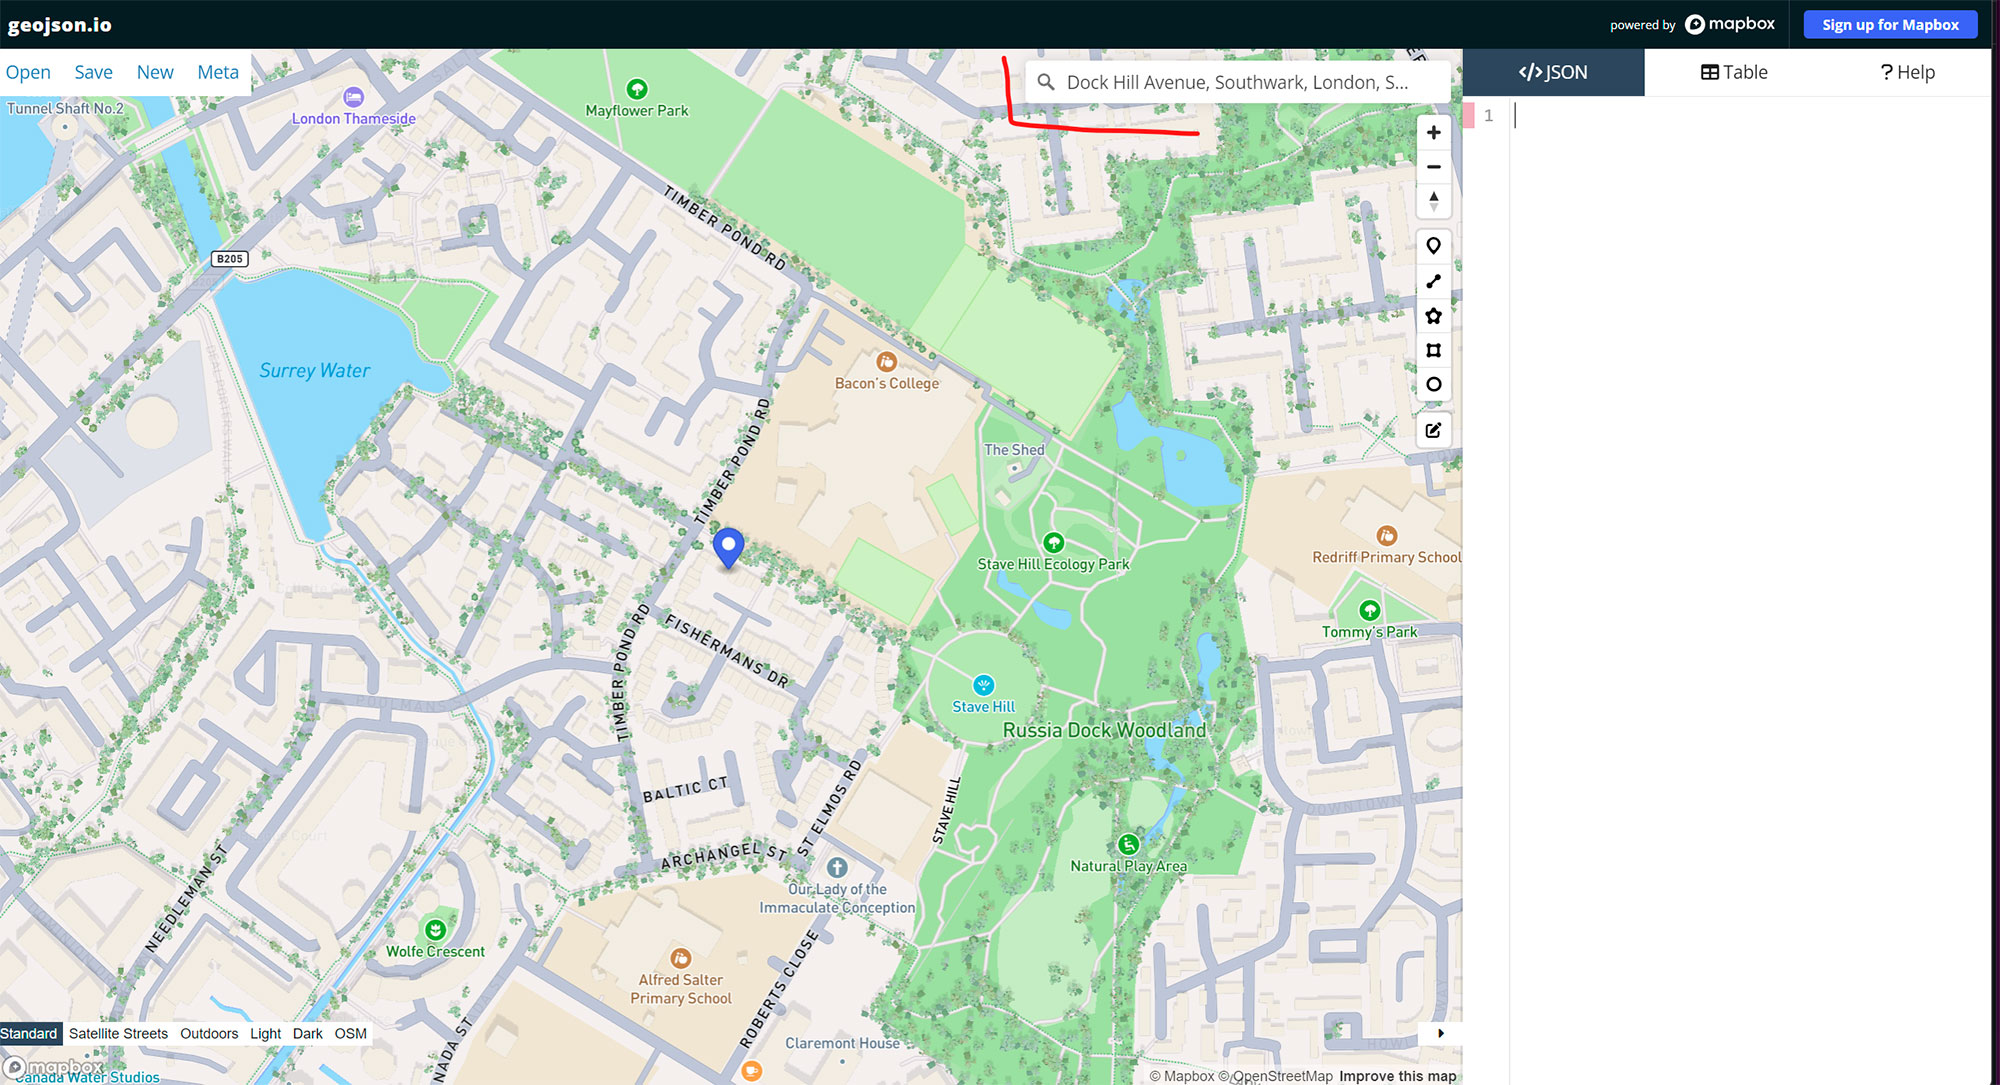
Then, you need to prepare two new tabs: one with a Rules page and another one where we will draw our Geo Zone. In this example, I will use a handy GeoJSON service by MapBox, but you can use any other.
Let’s start with the initial location because the simulated vehicle is located somewhere in London. You can copy the Address metadata value and copy/paste it into the search input on the GeoJSON website. You should see the blue marker pin and location similar to the one you can find below:
Next, let’s draw a circle-shaped area around the pin. Select a Circle shape, then single-left click at the bottom of the marker, and move your mouse up so you’ll start to see the orange circle. When the circle is big enough, click the left mouse button again to draw the circle, it should transition from orange to dark.
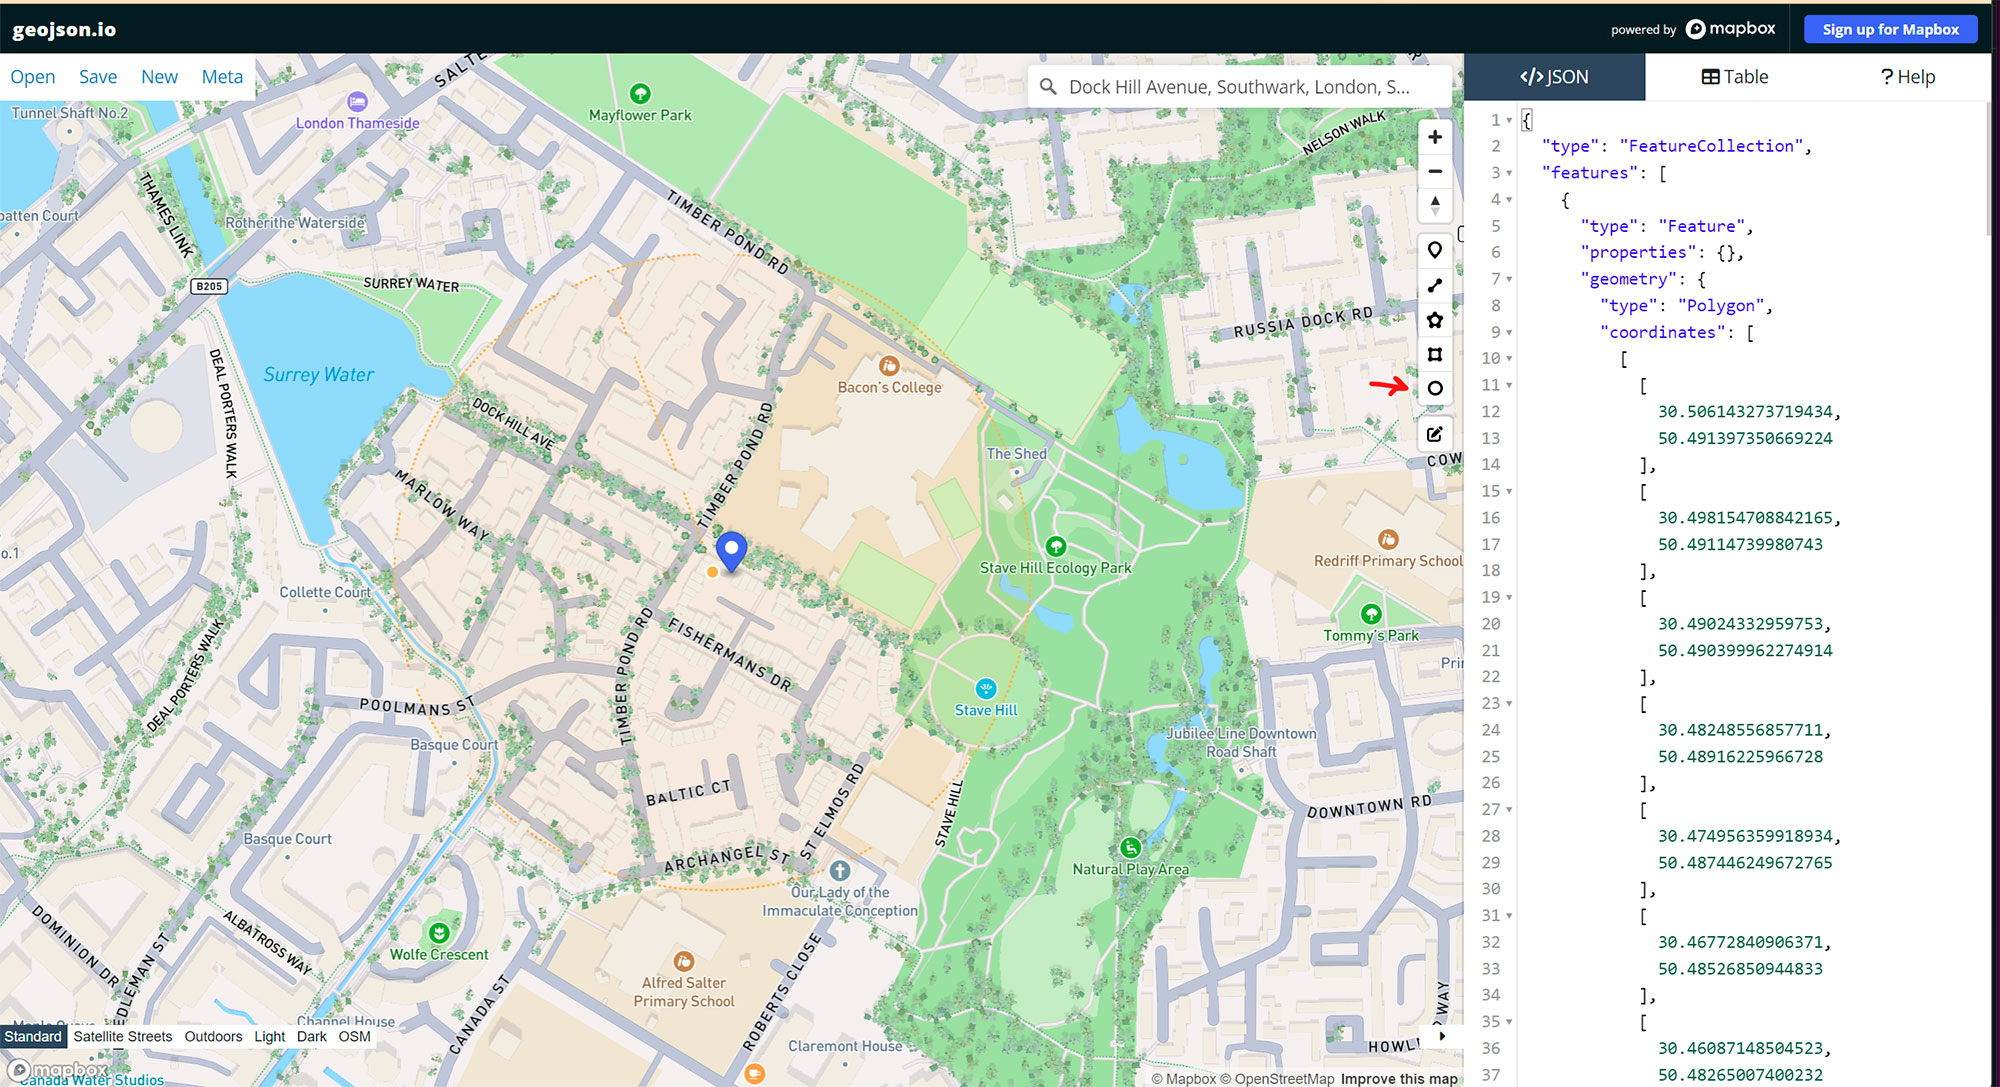
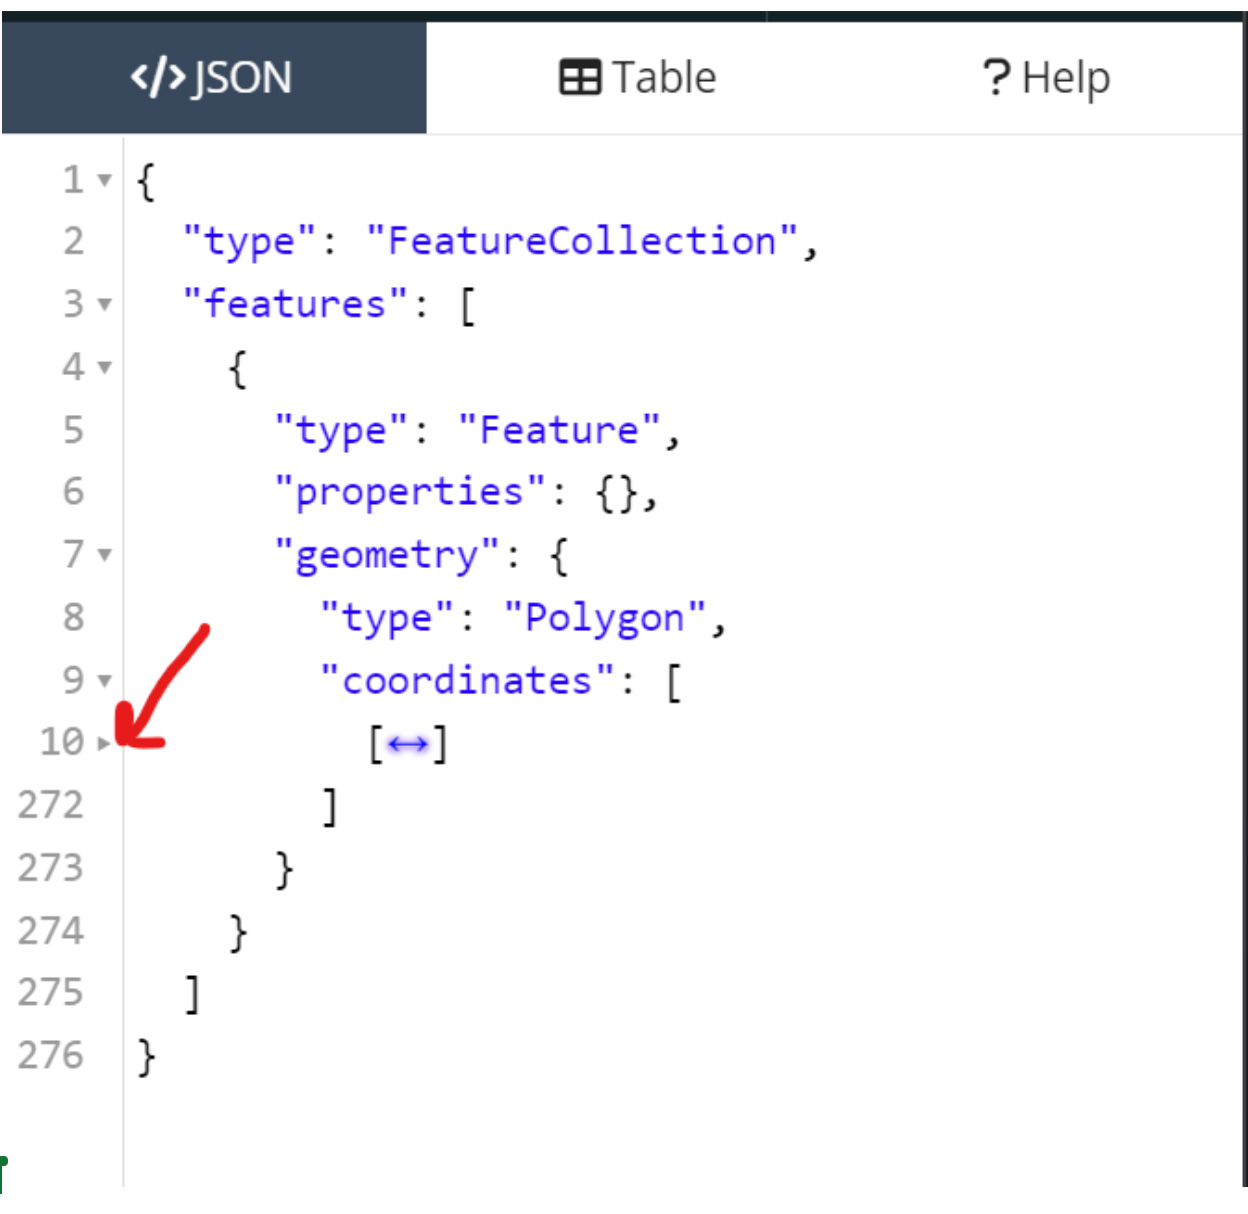
So now, in the JSON tab, you’ll see your circle shape converted to the Feature geometry. You can see the list of coordinates [longitude, latitude] that represent our circle. Let’s copy the content after the first square bracket [ until the closing bracket ]. We can easily copy it by clicking on the triangle icon to collapse the content. Then, we need to select collapsed brackets and hit Ctrl+C.
Start to write your own rule. Open the KaaIoT tab with Rules and hit Add rule. Give the Name zone-in-out and add the first Trigger. Scroll to Triggers, click on Add trigger, and select Create new.
Set the Trigger name to fleet-metadata-changes, select Trigger type as Endpoint metadata updated, choose your Application name with Fleet management, and scroll to Condition.
Now, let’s start to write our script. The logic for the condition should return either true or false. This script will be simple and follow the next flow:
- Create polygon geometry based on our Circle GeoJSON data
- Create a Point based on endpoint lon and lat from metadata
- Check if the point is inside the polygon, then return true and create an alert
- Check if the point is outside the polygon, then return false and resolve the alert.
Let’s start writing our rule by defining our shape. Start our code with the next line:
// Paste your shape inside
const zonePolygon = ctx.toolbox.geo.createPolygon( [
            [
              -0.042887288361839644,
              51.503659786479865
            ],
            [
              -0.043190644248456915,
              51.50365050954652
            ],
      … all other points
])

// Define the point based on current coordinates from metadata
const point = ctx.toolbox.geo.createPoint([
  ctx.endpoint.getMetadata().lon,
  ctx.endpoint.getMetadata().lat
])

// Return the result of computation if the point is outside the shape
return !zonePolygon.contains(point)
And that’s it! Our condition script is ready, and now let’s set up activating and resolving the alert.
Scroll to Actions and click on Add action.
First, let’s define Activation action.
- Make sure the Run action when condition field is set to Positive. This will dispatch the action and thus activate the alert when the condition evaluates to true, which means that the vehicle is out of the zone in our case
- Select Create new
- Select Action type to Alert activation
- Specify Name like zone-out-activation
- Find field Alert type and type zone_in_out and click Add in the dropdown to set it
- Find the Message type and in the Text area below, specify the message that will appear when the alert is activated, e.g., Vehicle is out of the zone!
- There is no need to change other fields
Now, let’s define Resolution action.
- Click on Add action
- Make sure Run action when condition is set to Negative. This will dispatch the action and thus resolve the alert when the condition evaluates to false, which means that the vehicle is inside the zone
- Select Create new
- Select Action type to Alert resolution
- Specify Name like zone-out-resolution
- Find the Alert type field and type zone_in_out. Click Add in the dropdown to set it
- Find the Message type, and in the Text area below, specify the message that will appear when the alert is activated, like Vehicle is returned to the zone!
Also, take a look at the video Alerts 2.0 step-by-step guide to set up on our YouTube channel.
Now, hit the Create button at the top right corner and wait until our Rule is created.
We are ready to test our rule by moving the vehicle outside of the zone in the Data publish tab.
Let’s try to update the metadata with coordinates that are outside the circle.
To get the two points that will be located inside and outside of our circle, we can draw a line that will include exactly what we need. To draw a line, go back to GeoJSON and click on the Line icon. Mouse left-click somewhere inside the circle, move your mouse, click outside, and click on the same point again to confirm the line; it should transition from orange to dark.
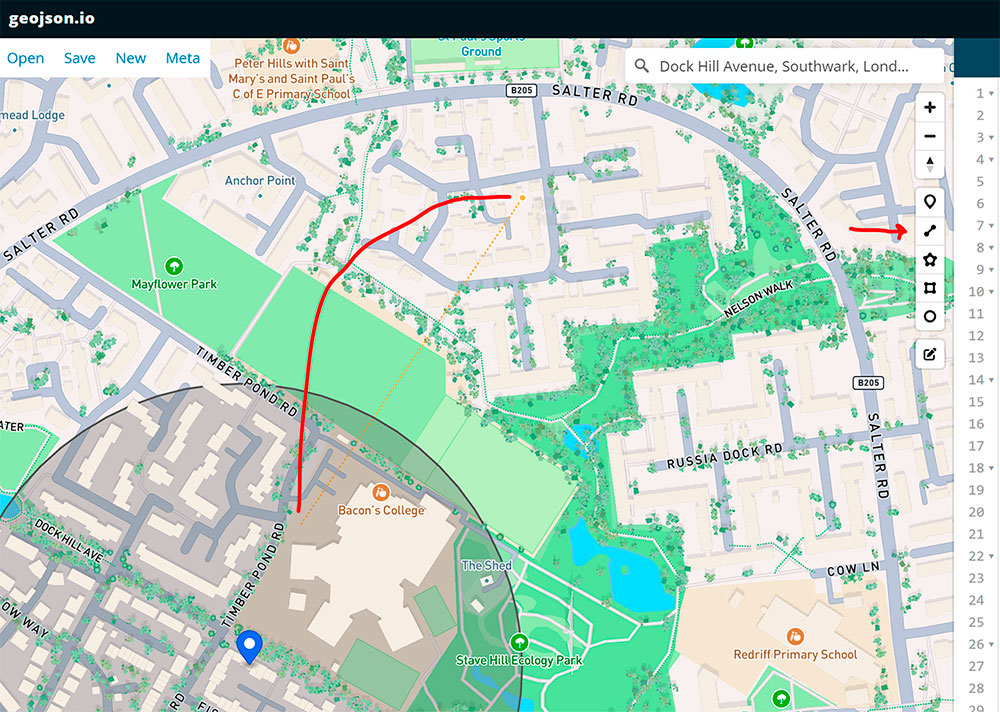
Now in the JSON tab, scroll to the bottom down, and you should see the new Feature geometry with type LineString. The first point should be inside, and the second should be outside the circle. Let's test it out.
In our case, they are:
[
    [
    -0.04221344023051188,
    51.50270381884269
    ],
    [
    -0.03978872328193006,
    51.50492769217041
    ]
]
Go back to the Data publish tab and start with the first point, which is inside. Change metadata payload with the first point coordinates and hit Send request:
{
  "lon": -0.04221344023051188,
  "lat": 51.50270381884269
}
Final steps
Now that there are only some steps left, open the Alerts tab from your Device page in the new tab and make sure you don’t see any new alerts since this point is inside the shape.
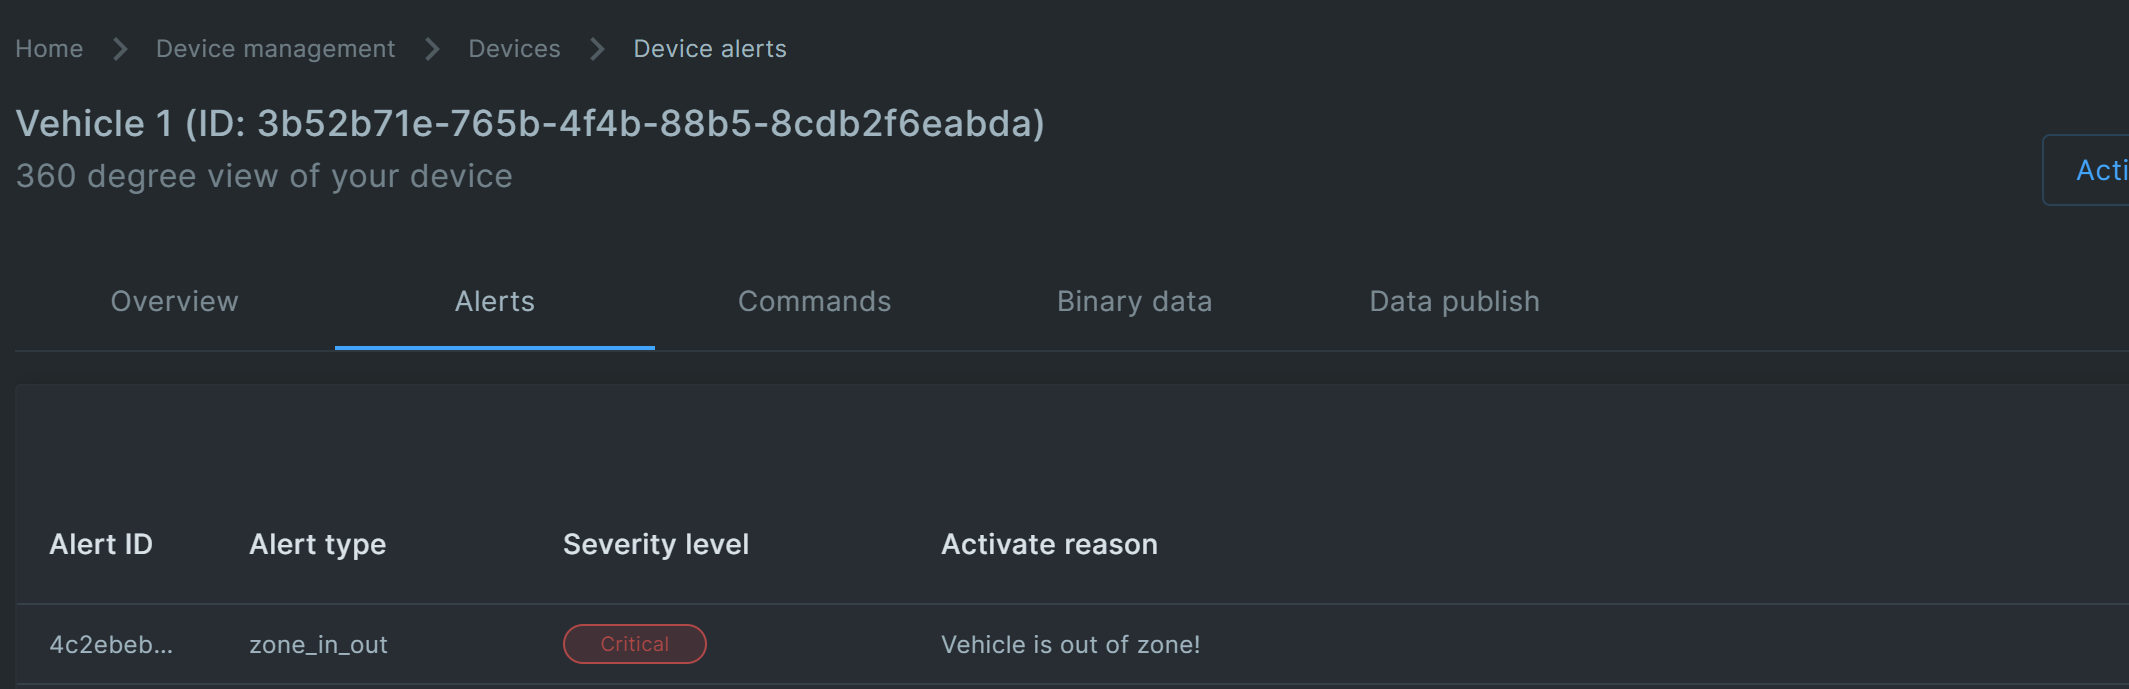
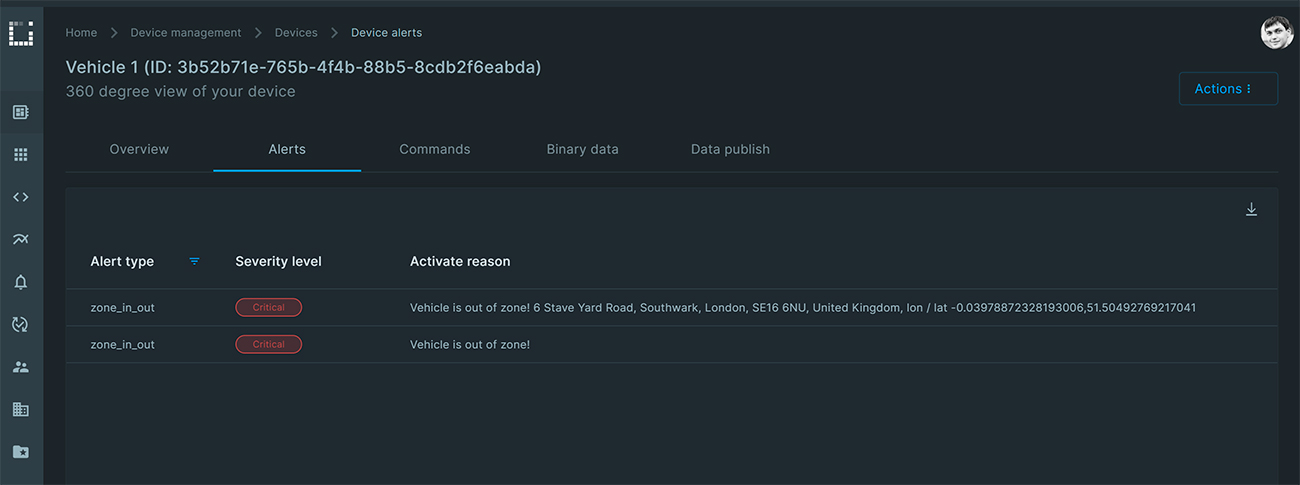
Let’s move the vehicle outside the zone. Specify the second point and publish via the Data publish tab by updating the Payload example and hitting Send request. Go back to the Alerts tab to see the new alert with the type zone_in_out and the Activate reason message Vehicle is out of the zone!:
Great! Our alert works. Now, check the resolution by updating the coordinates using the first point coordinates. Go to the Data publish tab and update the Payload example with the first point coordinates. They are inside the zone and hit Send request.
{
  "lon": -0.04221344023051188,
  "lat": 51.50270381884269
}
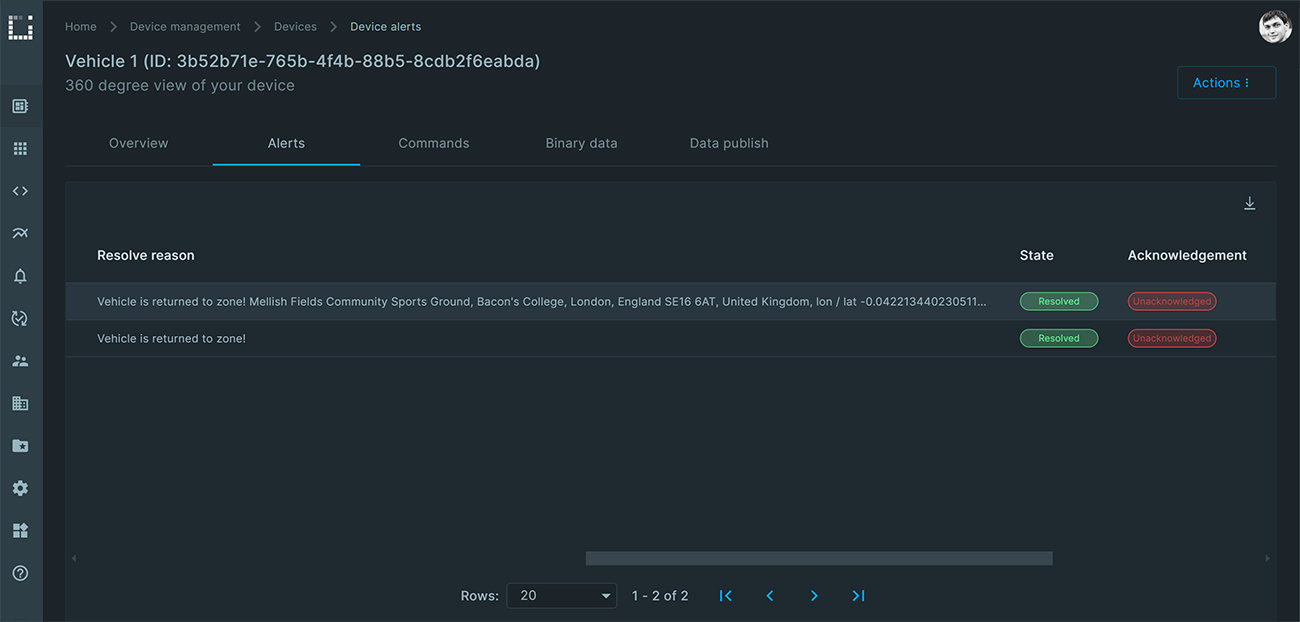
Now, check the Alerts tab. The alert should be in a Resolved state with the appropriate Resolution reason message, like Vehicle is returned to the zone!

Congratulations! Now, we have useful alert checking that helps track our vehicle location.
Bonus: Improving alert messages
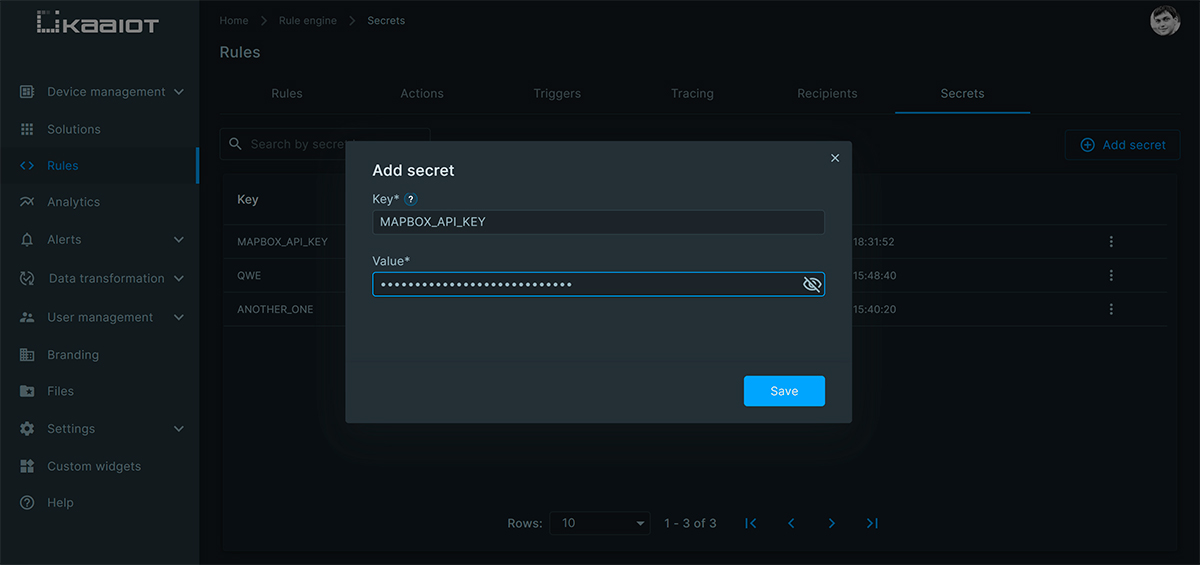
As a bonus, let’s improve our alert messages by adding the Address. To do this, we will use the MapBox reverse geocoding API. To use it, you need to register and get your token. After registration, copy your token, and we will add it as Rule Secret. Go to Rules -> Secrets and hit Add secret.
- Specify the Key to MAPBOX_API_KEY
- Copy & paste your API Key to Value
- Hit Save
Now open our Rule named zone-in-out in the Rules tab and navigate to Condition.
Copy and paste the next function that we will use to get the information based on our lon / lat coordinates. You can put this at the top of the file:
const reverseGeoCode = (lon, lat) => {
  return ctx.toolbox.httpClient.get(`https://api.mapbox.com/geocoding/v5/mapbox.places/${lon},${lat}.json`, {
    params: {
      access_token: ctx.secret.get('MAPBOX_API_KEY')
    }
  })
}
And before the return statement, add the next code block:
const reverseResponse = reverseGeoCode(
  ctx.endpoint.getMetadata().lon,
  ctx.endpoint.getMetadata().lat
)

ctx.data.address = `Place not found, lon / lat - ${ctx.endpoint.getMetadata().lon},${ctx.endpoint.getMetadata().lat}`;

if (reverseResponse.statusCode === 200 && reverseResponse.body.features && reverseResponse.body.features.length) {
  ctx.data.address = `${reverseResponse.body.features[0].place_name}, lon / lat ${ ctx.endpoint.getMetadata().lon},${ctx.endpoint.getMetadata().lat}`
}
The code above will:
- Perform a request to MapBox API to get information about the place using current coordinates
- Assign the default address part to the execution context in case the response doesn’t contain any information
- If-statement block that checks when content from MapBox is present, then reassigns the address value to the context
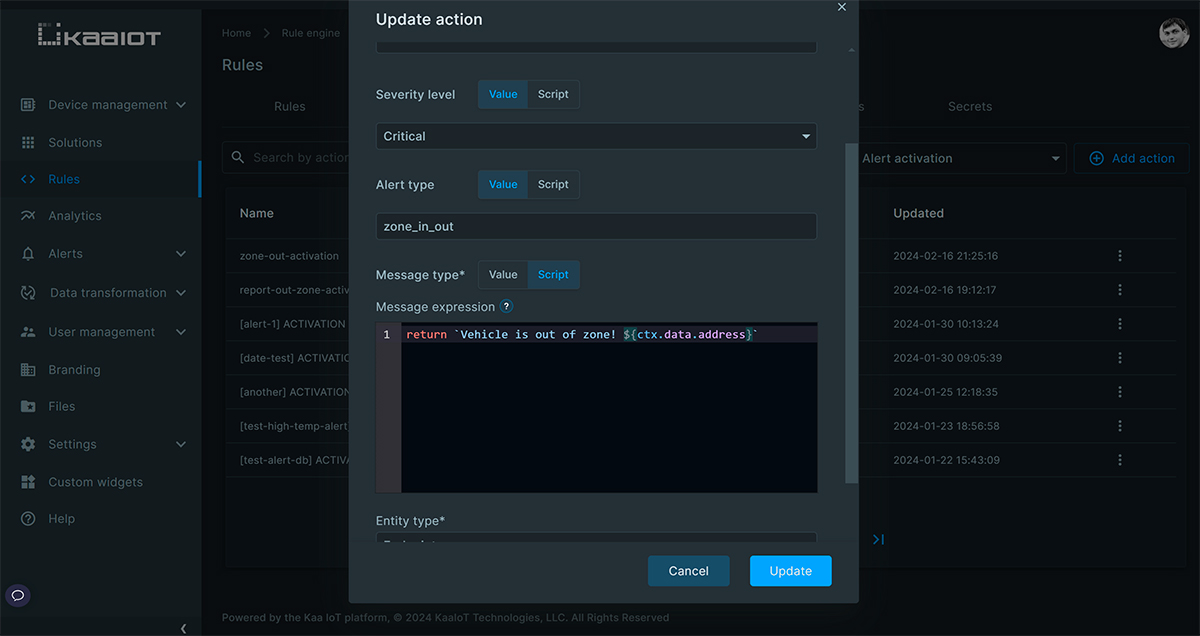
Now open the Actions tab and select the Action type to Alert activation. Find zone-out-activation action, click on the 3 vertical dots icon to open the actions menu, and hit Update.
In the Update dialog, find the Message type and select Script. Update the value to include our address from the rule context:
return `Vehicle is out of the zone! ${ctx.data.address}`
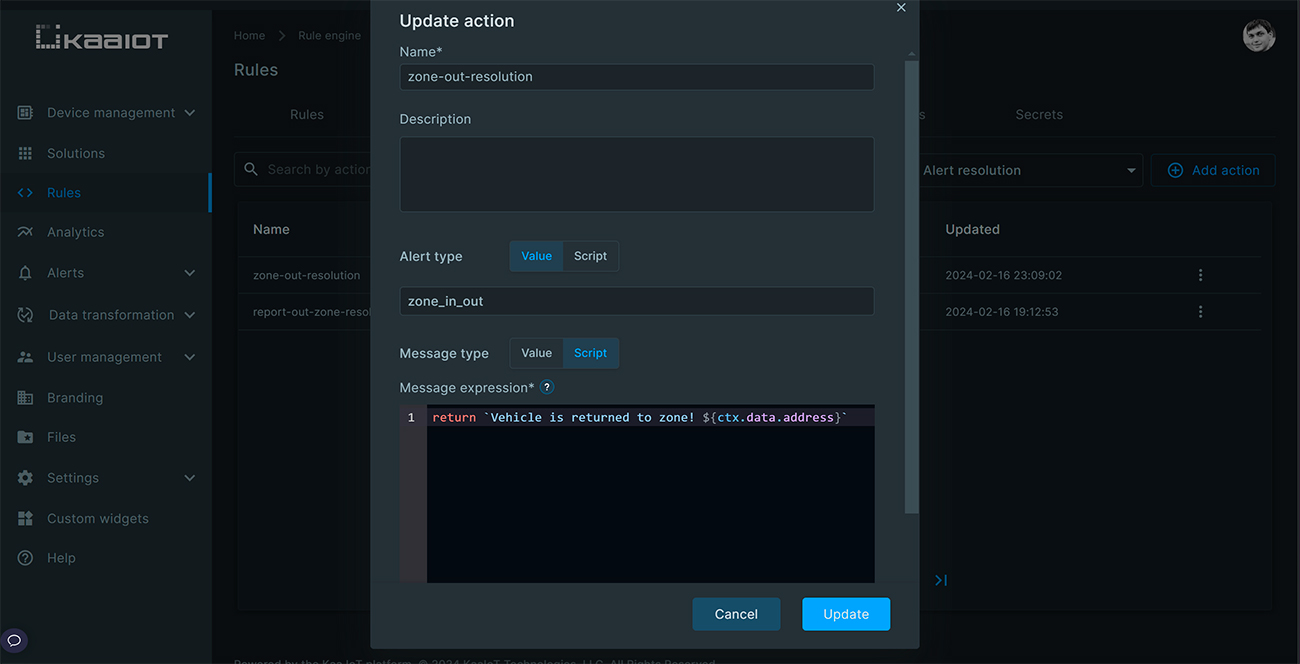
Hit Update and select Alert resolution in the Action type. Then select the box and update the message in the same way for the zone-out-resolution action.
Hit Update and repeat the location change via the Data publish tab.
You should see the new alert with a long Activation reason message like Vehicle is out of the zone! 6 Stave Yard Road, Southwark, London, SE16 6NU, United Kingdom, lon / lat -0.03978872328193006,51.50492769217041
Once resolved, the Resolution message will state: Vehicle is returned to the zone! Mellish Fields Community Sports Ground, Bacon's College, London, England SE16 6AT, United Kingdom, lon / lat -0.04221344023051188,51.50270381884269
Now we have everything up and running with helpful information. Don’t forget that you can use any Actions in combination with Geofence, like sending webhooks and email notifications and storing the in/out events into separate data samples that can be ingested for further analysis to determine behavior patterns. Also, you can enhance the rule with time-based validation to check if the vehicle enters or leaves zones at specific times.
Summing up
Let’s look through what we have learned together:
- How to work with Geofence case using Rule engine
- How to use geo point and polygon provided in Rule engine evaluation context under ctx.toolbox.geo.createPoint and ctx.toolbox.geo.createPolygon and how to use it to determine if point belongs to shape
- How to use Positive/Negative actions to organize alert handling
- How to use Rule secrets to securely store and use your API Keys used for third-party service integrations
- How the Data publish tab helps test Rules and simulate device behavior
Mastering basic geofence zones with in/out detection, coupled with reverse geocoding, opens doors to a multitude of possibilities in location-based services. By implementing these techniques, you can enhance their applications with intelligent location-aware functionalities, improving user experiences and unlocking new avenues for innovation. As technology continues to evolve, leveraging geofencing and reverse geocoding will remain essential to delivering tailored and impactful solutions in various industries.
Related Stories

KaaIoT & TEKTELIC partner to simplify IoT development with pre-integrated hardware & software solutions....

KaaIoT and Supermicro offer a combined solution for AI-powered IoT applications at the network's edge...

Uncover the potential benefits of machine condition monitoring in reducing downtime and increasing overall productivity...

Unlock insights into challenges, best practices & solutions for seamless IoT device management with our in-depth guide.